


Yes, I realize that pies fall under the dessert category but I make a lot of them. Soooo, I decided to give them their own special little page and here it is. I guess I still have some country girl in me :D!
Yummy Pie Recipes!
Peach Pie with Buttermilk Crust
Strawberry Pie – It’s So Berry Good!
Key Lime Pie with Rum Infused Whipped Cream
Grandma’s Apple Pie (Plus My Healthier Version)
Pecan Pie – Grandma’s – Oh Yeah!
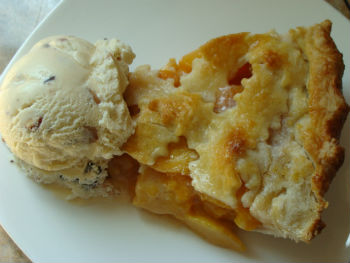
Peach Pie with Buttermilk Crust

Peach Pie with Buttermilk Crust (recipe and video tutorial follow) – Everyone in my family is a pie eater from our youngest child to our oldest. So, I make pie pretty much all during the year (there’s a pie for every season :)). Summertime though is like pie making season with all of the amazing fruit that comes into season. My very spoiled family gets to eat everything from blueberry pie to strawberry pie to raspberry pie with a sugar cookie crust. Not to mention the mango pie and the mango coconut and the mixed berry and every other combination of berries and summer fruit that you can think of. I can’t really say that I have a definite favorite, it just depends on my mood. For my husband on the other hand, I would say that it’s a toss up between blueberry pie and peach pie…..although he does love the raspberry with the sugar cookie crust – hmmm. Anyway, when I make this pie, I always end up making another with-in like a week because someone will get the last piece and then everyone else will be like (with a very sad face) “man, I was going to eat that piece”. So then, I end up making another so that everyone can have another piece. It’s fine with me anyway, I love peach pie and the peaches always go on sale in the summer so it’s not an expensive pie to make – always a plus. So, anyway, here’s my recipe for yummy peach pie with buttermilk crust. I hope that you love it as much as my family and I do. Enjoy and happy cooking! 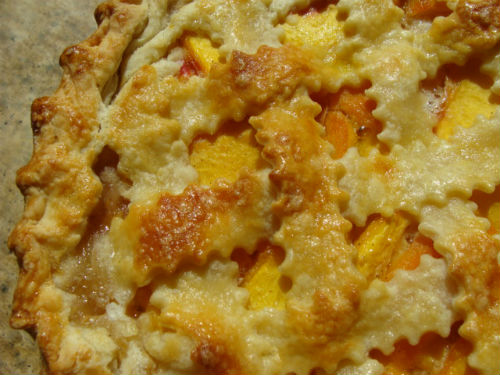 Ingredients for the Double Crust
2 1/4 cups A.P. flour
2 sticks butter
1/2 cup buttermilk
*up to 5 Tablespoons additional buttermilk
1 teaspoon almond extract
Ingredients for the Peach Filling
9 peaches (5 1/2 – 6 cups sliced)
1/2 cup cornstarch
1 cup sugar
3/4 teaspoon cardamon
1 teaspoon Kosher Salt
2 Tablespoons butter
Instructions for the Pie Crusts
1. Place your flour in a small mixing bowl.
2. Add the butter to the bowl. It is easiest if you slice the butter as you add it.
3. Mash the butter into the flour using a pastry blender or a fork until it looks like small crumbs (see video).
4. Add 1/2 cup of buttermilk and stir to combine.
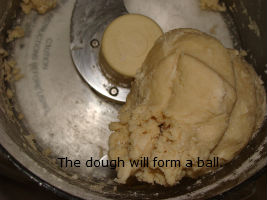
5. Add three more Tablespoons of buttermilk and stir to combine. You are looking for your crust to come together into a ball as you stir. If your crust does not come together, you need to add more buttermilk. The last two Tablespoons will usually be enough.
6. Place the crust onto a well floured surface and form it into an even disk. Cut the disk in half so that you have two equal pieces. One piece is for the top crust and one is for the bottom.
7. Form one of the pieces into a disk and roll it out. Set the other to the side.
8. Place the crust in your pie pan and dock it (poke holes in it so it does not puff up in the oven). Set it to the side while you make the filling.
 Instructions for the Peach Filling
1. Rinse and peel your peaches. You can either peel them with a veggie peeler, or you can blanch and peel them.
*to blanch your peaches, cut a small x on the bottom, place into rapidly boiling water for 30 seconds, remove from the boiling water and place into an ice water bath, then peel (see video)
2. Slice peaches about 1/4 inch thick.
3. Place your peaches into a large bowl.
4. Pre-heat your oven to 350°F if you haven’t already.
5. In a separate bowl, combine the sugar, cornstarch, cardamom and Kosher Salt. Stir until evenly combined.
6. Sprinkle the sugar and cornstarch mixture over the sliced peaches and stir until the peaches are evenly coated. Set them to the side. As a side note here, if you did not make the homemade crust above and are using a store bought crust (which is fine) then you need to add the almond extract into the pie filling. It is a very important flavor component.
7. Roll out the top crust and cut it into strips using a pizza cutter or pastry wheel cutter if you have one.
8. Pour the peaches into the bottom crust.
9. Cut the two Tablespoons of butter into small pieces and place evenly around the peaches.
10. Form the lattice crust on top (see video if needed).
11. Bake your pie at 350°F for 50 minutes to 1 hour. I put mine on a sheet pan in the oven just in case it boiled over but it didn’t. (I didn’t want to take a chance, my oven is spotless right now :))
12. Let your pie cool for at least four hours before you try to cut into it or it will run. I let mine set out for about four hours and then put it in the refrigerator overnight.
13. Enjoy your delicious pie!
Please enjoy this how-to video!
Strawberry Pie – It’s So Berry Good!

Strawberry Pie (recipe follows)- If I were to ask 100 people what their favorite part about the summer is, I imagine that most would say either the weather or the break from school/work. Me, well, I love school being out because I get to have the kids at home and as for the weather, yeah, not so much. I live in Phoenix, so this is more the stay inside time of year. But, besides school being out, one of my favorite things about summer is the produce. Yes, the produce. I want to sing a little song that goes like ? berries, berries, berries ? (wow, I can’t think of the name of the tune so you can sing along with me – I think it may be ? Conga, Conga, Conga ?). Anyway, in the summer time I make berry everything – including berry pies! Strawberry pie, blueberry pie, raspberry, blackberry, you get the idea :D! For some reason though, I was in an especially strawberry(ee) mood this year and I’ve been making strawberry pie like a mad woman. It’s just so tasty. Oh, we have to have a quick talk about the whip cream, cool whip thing. You should know that I am almost always a whipped cream kind of girl. However, when it comes to strawberry pie, I am decidedly cool whip. There is a very good reason for this – want to hear it, here it goes ??. Just kidding, but really. The reason is of course because of my awesome Grandma. She made strawberry pie every summer and on my Uncle’s Birthday in May (in case you were wondering) and always served it with cool whip. Soooo, now to me, my strawberry pie only tastes right with cool whip. Otherwise, it tastes like something is missing. I would like to suggest to you to try it both ways, you never know, you may like the cool whip too!
 Ingredients
2 pounds Fresh Strawberries
1 cup sugar
1/4 cup cornstarch
1 Tablespoon Key Lime Juice (you can also substitute regular lime or lemon)
1/4 teaspoon salt
1 pre-baked pie shell (either homemade or store bought)
Instructions
1. Make and bake your pie shell or cook your store bought one according to the package instructions and set it aside to cool. Make sure you dock (poke little holes with a fork) your dough before baking so it doesn’t get bubbles when it bakes. 
2.Clean and hull (remove the stems and leaves) all of your strawberries.
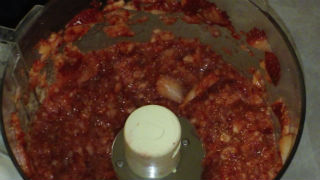
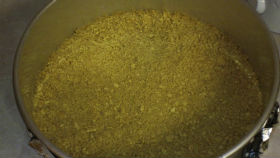
3. Place one pound of strawberries in the food processor and pulse until they are pureed but still have little chunks. If you don’t have a food processor, you can use a potato masher. Also, I use the bigger strawberries for this part and save the smaller ones for step 10.
4. Place your puree into a medium sauce pot on the stove.
5. Add your sugar, cornstarch, Key Lime juice, and salt. Stir to combine. Pay close attention to the color. It has a kind of white color to it. You will be able to tell your filling is done when that white disappears and turns glossy.
6. Turn the heat on medium – high (on most stoves)
7. Cook until the white color is gone and the filling is very glossy. It will also thicken. This takes around five minutes. Also, stir it the whole time making sure to scrape the bottom as you stir. I use a high heat rubber spatula to stir mine. 
8. When your filling has that beautiful gloss to it, remove it from the heat and set it to the side.
9. Get your pre-baked pie shell and put a thin layer of the filling on the bottom (the filling doesn’t have to be cooled for this part).
10. Place one layer of fresh strawberries into the pie shell.
11. Pour the filling on top and spread it as evenly as possible. The filling will still be hot, but should have cooled for at least five minutes. I do not let mine cool more then 10 minutes though because it gets too thick and will not pour all around the sides of your strawberries.
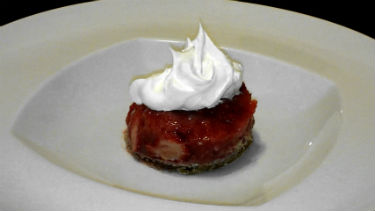
12. Place the pie in the refrigerator for about 3-4 hours – until it sets up and serve! I garnish mine with cool whip like I said, but whipped cream is good too :D
 Please enjoy this “how-to” video!
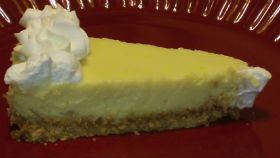
Key Lime Pie with Rum Infused Whipped Cream

Key Lime Pie – For those who don’t know, I used to live in South Florida. I loved it there :D! They have amazing weather, the beach, a nice breeze all the time, generally happy friendly people and delicious Key Lime Pie. Aaaahhhhh, Key Lime Pie. Just the thought of it makes me long for a hammock between 2 palm trees and the sound of the ocean. One of the best things we used to do when I lived in Florida was to run off for a long weekend in Key West. And what do you eat when you’re in Key West? That’s right, conch chowder :D – but more importantly, you eat delicious Key Lime Pie! I’m pretty sure that it’s a rule of some sort :). So, anyway, the point is that I, being partially from Florida, am super duper picky about my Key Lime Pie and I can taste a cheater recipe from a mile away. Folding Key Lime flavored Jello with cool whip does not a good Key Lime Pie make. There are also some short cuts out there where you use the right ingredients, you just kind of skip over some of the steps. This results in the right flavor but the wrong consistency – like I said, I’m super duper picky. So what are the ingredients that are absolutely required? Well not to state the obvious, but Key Lime juice, and also eggs and sweetened condensed milk. The reason sweetened condensed milk is necessary to make it authentic is kind of cool – ammmmmm if you’re a food nerd like me anyway. It has to have sweetened condensed milk because the Overseas Highway wasn’t built until 1930. Why is that important Alicia(?) (you may be wondering). Well, let me tell you why. Fresh milk wasn’t readily available in the Keys until that highway came around (unless you had a pet cow I guess). So, the local cooks relied more on sweetened condensed milk which has been around since 1856. Therefore, without sweetened condensed milk, it’s not the real thing. When was the first Key Lime Pie made? No one really knows, but it is believed that it was made sometime in the mid to late 1800′s either by a woman referred to as Aunt Sally (cool history lesson that you’ll have to Google for yourself), or by the local fisherman. I also learned that some historians believe that the fishermen made it and Aunt Sally perfected it. Either way, I’m glad they didn’t have fresh milk, because sweetened condensed is so very tasty! The other controversy with Key Lime Pie is over the topping. Was it originally meringue or was it whipped cream? Hmmmm, let’s think about it for a minute. If they didn’t have milk readily available, they probably didn’t have cream either. So, I’m thinking it was meringue. Also, it may interest you to know that if you look up Aunt Sally’s recipe, she used meringue (no wasting the whites from those separated eggs).That said, I use whipped cream because it’s yummier to me. I also add rum extract to my whipped cream (Rum and Limes are friends, just ask a mojito). Oh, and here’s one more Key Lime Pie fact for you, just in case you’re ever on Jeopardy or something. Key Lime Pie is the official pie of Florida, yeah, it’s true, since 2006. Guess what pie was it’s competition. Music- do do do do do do do do do do do doot do do do do do – OK, ready for the answer? Pecan Pie. I love them both but I have to say, that pecans make me think Georgia, not Florida so I think they got this one right :D! Wow, my goodness I had a lot to say about Key Lime Pie. You would think I was passionate about it or something LOL! Happy Cooking!
 Ingredients
Crust
2 cups graham crackers, crushed (chocolate cookie crumbs are yummy here too)
1/2 teaspoon cinnamon
4 Tablespoons butter, melted
Filling
6 egg yolks
2 (14 ounce) cans sweetened condensed milk
1 cup Key Lime juice
 Rum Infused Whipped Cream
1 cup heavy whipping cream
2 Tablespoon confectioners’ sugar
1/2 teaspoon rum extract
Instructions for the Crust
1. Pre-heat your oven to 350°F.
2. Place graham cracker crumbs into a small mixing bowl. The easiest way to get the crumbs is to put the graham crackers into a gallon baggie and roll over them with a rolling pin.
3. Add the cinnamon and stir it to combine.
4. Add the butter and stir with a spoon until it’s combined, then use your hands to mash the butter into the crumbs until they start to hold together.
5. Press the crumb mixture into the bottom of a 10 inch spring form pan which has been sprayed with cooking spray.
6. Bake at 350°F for 5 minutes and remove it from the oven.
7. Set your crust to the side to cool.
 Instructions for the Pie Filling
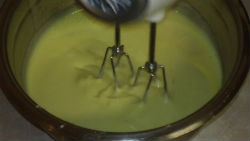
1. Place the egg yolks into a medium mixing bowl.
2. Mix on high speed until they become a pale yellow color and are doubled in volume.
3. Add the sweetened condensed milk and mix on medium for one minute.
4. Add the Key Lime Juice.
5. Mix on medium for about another 30 seconds to one minute, you’re looking for a nice thick, creamy consistency.
6. Pour the filling onto your cooled crust (make sure the sides of the pan have a little cooking spray on them).
7. Bake at 350°F for 15-20 minutes until the center is set (mine took 19 minutes), do not over-cook or when you cool it, it will crack.
8. Allow your pie to cool at room temperature for an hour or so and then put it in the fridge over-night. If you don’t let it set at room temperature for the hour before you put it in the refrigerator, it may crack.
Instructions for the Rum Infused Whipped Cream (Make this the day after you bake the pie or the day you’re serving it).
1. Place cream in a medium mixing bowl.
2. Mix on high speed until foamy.
3. Add the confectioners’ sugar 1/2 at a time mixing in between additions.
4. Continue mixing to soft peaks.
5. Add the rum extract.
6. Continue mixing until stiff peaks form.
To Finish your Key Lime Pie
1. Run a knife around the edges of the pie to make sure it isn’t sticking anywhere.
2. Remove the sides of the spring-form pan.
3. Decorate your pie – I used a piping bag with a large star tip.
Please Enjoy this how-to video!
Grandma’s Apple Pie (Plus My Healthier Version)
")
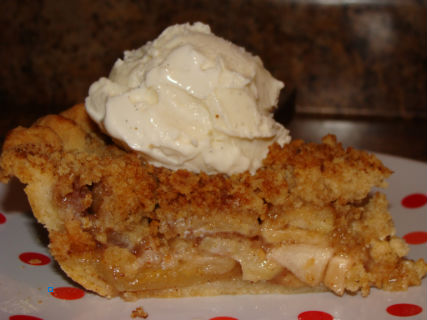
Grandma’s Apple Pie – Grandma’s apple pie is a tradition at every get together our family has from Thanksgiving and Christmas to The Fourth of July! It is also one of the things she made every time we went over for the weekend even on non-holidays for my spoiled :) brother (just kidding Kevy, you know I love you)! I have no idea how old this pie recipe actually is but Grandma has told me she has been making it this way for 60 years, so it’s at least that old. It is a simple version of apple pie. One that really shows off how beautiful good apples can be. So, it is important to use high quality apples because they are definitely the main flavor component – as they should be. When I make my apple pie, I use organic apples. I think it makes a huge difference in the end flavor. I also use several different varieties to get a nice range of flavor and texture. Grandma uses McIntosh or Jonathan almost exclusively. I am going to give you Grandma’s recipe exactly how she makes it and am going to follow with the healthier version that I make for my children now. I hope you love them both! Happy Cooking!
 Ingredients for Grandma’s Traditional Apple Pie
Grandma’s Pie Crust
Ingredients
1 cup plus 2 Tablespoons AP flour
1/2 teaspoon salt
7 Tablespoon lard (like Crisco)
3 Tablespoon cold water
Instructions for Crust
*I do this whole process in my food processor. Instead of mash, mash, mash in step 3, you pulse, pulse, pulse :D!
1. Place flour and salt into a medium mixing bowl, stir to combine.
2. Add the lard a spoon at a time. 
3. Use a fork to mash the lard into the flour (cut the lard into the flour), to do this you pretty much just mash the chunks of lard with the fork and then coat them with flour and then mash again and coat again until you end up with something that resembles corn meal with little baby pea size chunks of lard covered in flour in it.
4. Add the cold water and stir, your dough should come together and form a ball – if it doesn’t come together into one happy clump, add another Tablespoon of water and that should do it. Generally though, you won’t have to.
5. Place your dough onto a floured surface and roll it out to 1/4 inch thick.
6. Put it into your pie pan and make it pretty, then dock it (that means poke some holes in it with a fork).
7. Put your crust to the side for now.
Ingredients for Filling
5 1/2 -6 cups apples, peeled and sliced 1/4 inch thick (Grandma’s written recipe says 4 cups, but this is one of those recipes that if you haven’t made it with Grandma, it doesn’t come out the same – so 5 1/2 – 6 cups)
1/2 cup sugar
1 teaspoon cinnamon
3 Tablespoons AP flour
Instructions for Filling
1. In a small bowl, add the sugar, cinnamon, and flour and stir to combine.
2. Place the apples in a large bowl and pour the flour mixture on top.
3. Toss the apples to coat with the flour mixture.
4. Set apples to the side.
 Ingredients for the Crumb Topping
1 cup AP flour
1/2 cup brown sugar
1/2 cup butter
Instructions for the Crumb Topping
*Again, this can be done in the food processor using pulse.
1. Place your flour into a small mixing bowl.
2. Add the brown sugar and stir to combine.
3. Add the butter into the bowl in slices.
4. Mash the butter in with a fork (cut the butter into the flour) until it has that cornmeal/baby pea texture like the crust.
5. Set your crum topping to the side.
Assemble and Bake Your Pie
1. Pre-heat your oven to 350°F.
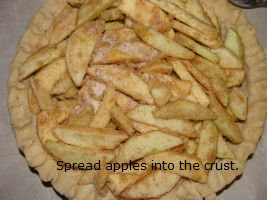
2. Pour your apples into the crust, spread them out to make them even (they should be higher then the crust edge, they’ll cook down).
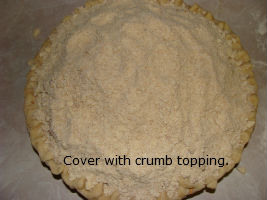
3. Carefully pour the crumb topping over the apples, try to keep it as even as possible.
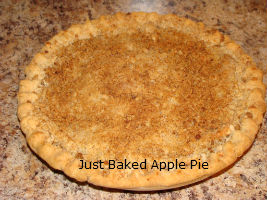
4. Bake at 350°F for 45-50 minutes.
Please enjoy this video tutorial (note that I “spice it up” a bit in the video)!
And now, my healthier version :D!
 Pie Crust
Ingredients for “Poured” Pie Crust
1 cup whole wheat flour
1 teaspoon splenda
1/4 cup olive oil (you can also use canola if you’re worried about the taste)
1/4 cup milk
Instructions for the “Poured” Crust
1. Mix the flour, salt, and splenda together in a bowl.
2. Add the oil and stir until well combined.
3. Add the milk and stir until combined (the crust should come together into a ball).
4. Place crust into an 8″ pie pan and use the palm of your hand to spread across the bottom.
5. Work the crust up the sides of the pan (try to keep it all even).
6.Once you have it all spread, dock it (poke some holes in it with a fork).
7. Add your filling.
*there is a “how to” video of the poured pie crust on my Quiche Lorraine recipe
**This is not Grandma’s crust!!!
Ingredients for Filling
5 1/2 – 6 cups apples, peeled and sliced 1/4 inch thick (I use a variety such as 2 Granny Smith, 1 Gala, 1 McIntosh, 1 Fuji, I always include the Granny Smith, but the others I change up so feel free to use your favorite)
1/4 cup Splenda
1/4 cup brown sugar
1 teaspoon cinnamon
3 Tablespoon AP flour, you can replace this with 2 Tablespoons of Tapioca Flour, but it does affect the flavor a little.
Instructions for Filling
1. In a small bowl, add the Splenda, brown sugar, cinnamon, and flour and stir to combine.
2. Place the apples in a large bowl and pour the flour mixture on top.
3. Toss the apples to coat with the flour mixture.
4. Set apples to the side.
 Ingredients for the Crumb Topping
1/2 cup rolled oats
1/2 cup whole wheat pastry flour
1/2 cup brown sugar
1/2 cup butter
Instructions for the Crumb Topping
*I do this whole process in my food processor. Instead of mash, mash, mash in step four, you pulse, pulse, pulse :D!
1. Place your flour and oats into a small mixing bowl.
2. Add the brown sugar and stir to combine.
3. Add the butter into the bowl in slices.
4. Mash the butter in with a fork (cut the butter into the flour) until it has that cornmeal/baby pea texture like the crust.
5. Set to the side.
Assemble and Bake Your Pie
1. Pre-heat your oven to 350°F.
2. Pour your apples into the crust, spread them out to make them even (they should be higher then the crust edge, they’ll cook down).
3. Carefully pour the crumb topping over the apples, try to keep it as even as possible.
4. Bake at 350°F for 45-50 minutes.
Pecan Pie – Grandma’s (Oh yeah!) – Recipe
 – Recipe")
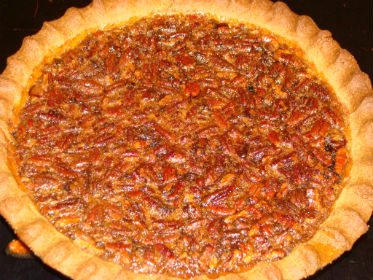
Grandma’s Pecan Pie! – Grandma’s pecan pie is a Thanksgiving tradition in our house – like a must have Thanksgiving dish. We also sometimes we make it for Christmas or just because we are craving it too. My whole family loves it including my 3 year old food critic who is very hard to please at the dinner table :)- always a bonus. I have to admit though that when I was 3 I wasn’t really a fan. But, I love this pie so much, now. It’s kind of funny that as a little girl, I never really appreciated it. I can remember everyone around me talking about how wonderful it was, and I just never liked it. However, as an adult, I leer at people from across the table and wonder what their problem is if they don’t love this pie from the first bite. LOL. This is my daughter Vanessa’s favorite pie and her only request for Thanksgiving. Enjoy!
Grandma’s Pie Crust
Ingredients
1 cup and 2 Tablespoons A.P. Flour
1/2 teaspoon salt
7 Tablespoons lard (Crisco)
3 Tablespoons cold water
Instructions
*Please also note that I have included a recipe and instructions for a Whole Wheat “Poured Crust” at the bottom of this recipe after the video.
1. In a small bowl, mix the flour and the salt. Stir.
2. Add in the lard (Crisco) and mash it into the flour with either a fork or a pastry blender. Continue mashing until the consistency looks like cornmeal mixed with small chunks of lard (about baby pea size) coated in flour.
3. Add the water and stir. The dough should come together into one lump, kind of like a ball. If you have time, wrap your dough in plastic wrap and chill your dough for one hour. This helps with the flakiness. If you don’t have time, that’s OK, it’s ready to roll.
5. Form your dough into a disc shape about 1 1/2 inches thick. Roll your dough in a “+ X” pattern. This means that you start by rolling upwards from the center, then down from the center, then to the right from the center, then to the left from the center. That is the “+” part of the pattern. Next, do the x pattern starting from the center with each direction change. Using the “+, X” pattern helps your pie crust stay in a circle shape. Also, when you are rolling, be sure to stop just before you reach the edges of the crust. If you run over the edges, you will end up with thin edges on your pie shell, so, go just to the edge each time and stop.
6. Carefully move your crust to the pie pan. The easiest way to do this is to roll the crust about halfway onto your rolling pin and then unroll it into your pie pan starting from the middle.
Pie Filling
Ingredients for Pecan Pie Filling
1 c dark corn syrup
1 c light brown sugar
1/3 c melted butter
1 c pecans, broken into fours
3 eggs
dash vanilla
dash salt
Instructions for Pecan Pie Filling
1. pre-heat oven to 350°F
2. measure all ingredients
3. in a large bowl, beat eggs
4. add in all the other ingredients
5. stir well to combine
6. pour into a pie shell
7. bake at 350°F for 45-50 minutes
8. allow to cool before serving
yield – one 8″ pie
Check out this “how-to” video! Yummy!
*Whole Wheat Poured Crust
Ingredients for a Whole Wheat Poured Crust
1 c whole wheat flour
1 tsp splenda
1/4 c canola oil
1/4 c milk
Instructions
1. mix flour, salt, and splenda together in a bowl
2. add the oil and stir until well combined
3. add the milk and stir until combined (the crust should come together into a ball)
4. place crust into an 8″ pie pan and use the palm of your hand to spread across the bottom
5. work the crust up the sides of the pan (try to keep it all even)
6. once you have it all spread, dock it (poke some holes in it with a fork)
7. add your filling
*there is a “how to” video of the pie crust on my Quiche Lorraine recipe
**This is not Grandma’s crust!!!