


Hi, welcome to Culinary 101! It’s super helpful to have a little basic “Chef Skill” in the kitchen. Plus, I want my site to be more than a bunch of recipes. I’d love to show you all the art, the chemistry and the love behind being a Chef! So, here are a few basic lessons. I’ll add to them now and then when I think some of you may need a little extra info to get awesome results with one of my recipes. Even if you’re already amazing in the kitchen, there’s always something to learn. I love working with others in the kitchen for just that reason. I hope you love these lessons, and more importantly, I hope you learn something! Happy Cooking!
Lessons
Grilled Chicken – Also, a Little Extra About Brines
The Cookie Method – How to properly mix your dough :D!
Table Salt – Strangely Not for the Table
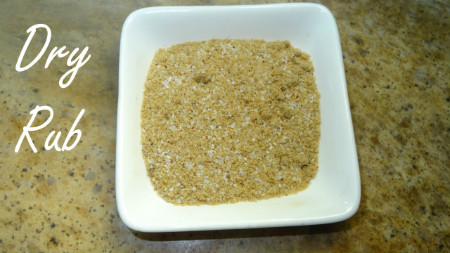
Dry Rub

1 Tablespoon Kosher Salt
2 teaspoons chili powder
1/2 teaspoon black pepper
1/2 teaspoon onion powder
1/2 teaspoon garlic powder
2 Tablespoons brown sugar
1. Place all of the ingredients into a bowl and stir to combine. Store in a tightly sealed container.
Please enjoy this how to video!
 Local Business Directory, Search Engine Submission & SEO Tools
How to Make Pumpkin Puree

How to make pumpkin puree – Looking around my house right now is kind of making me laugh at myself. This year I got this idea in my head to decorate with real fall/winter produce – beautiful pumpkins (sugar pie and Jarrahdale), butternut , spaghetti and acorn squash are lining every shelf in the room lol. I think that I may have went just a little bit overboard……well, maybe not. I do have a very serious pumpkin addiction lol so this may work out perfectly. Anyway, that’s not why I started writing this :)Today, I wanted to share with everyone an easy way to make your own pumpkin puree. Not only is it easy but it is nutritious and gives you a little more play in your recipes. Some of you may not know this but pumpkins have slightly different flavors and textures depending on the variety. For this recipe, I used a sugar pie pumpkin which has a dense flesh with a strong “pumpkin flavor”. It is also less watery then the larger varieties that are used for carving. I also really love the creamy texture and subtle melon aroma and fruity flavor of the Jarrahdale. The Jarrahdale are also less “stringy” then other varieties. For me, both make a great pie. When you choose your pumpkin, look for one that is heavy for it’s size. I have also been told to look for a matte color on the outside. A shiny outside is an indication that it could have been picked too early or that it is waxed. 
Making your own puree is easy.
Ingredients
pumpkin
water
That’s it, no preservatives :)
Instructions
1. Cut the pumpkin in half and remove the seeds.
2. Remove the stem.
3. Cover tightly in foil.
4. Bake on a sheet pan at 350°F until it is fork tender. I like to do the first 20 minutes foil side down and the rest of the roasting foil side up. My pumpkin took around 45 minutes.
5. Allow the pumpkin to cool completely and then scoop the flesh into a food processor. Add about a Tablespoon of water and pulse it a few times. Open the food processor, check for large pieces and push them to the bottom. Also, add more water if necessary to get a smooth puree. The amount of water you need will vary depending on how soft it was to start. I used about 1/4 cup of water in all.
6. At this point, I like to separate mine into 15 ounce portions and freeze it in gallon baggies for later use.
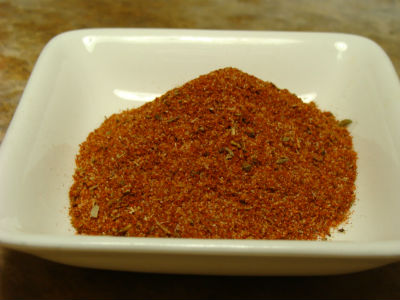
Cajun Seasoning

Cajun Seasoning – (recipe and video tutorial (coming soon) follow) – Now days, when you go to the store (like a regular grocery), it seems like the spice isle has more blended spices then individual spices. You commonly see things like “steak rub, Cajun seasoning, seasoning salt, pizza seasoning, jerk seasoning, southwest seasoning” and the list goes on and on. I think this is great and convenient except for one little thing. I feel like you lose control of your recipe. Let me explain. Say you went to the store to buy Cajun Seasoning. Then you bring your Cajun Seasoning home and you make some….. I don’t know – chicken with it. Well, one of three things are going to happen. You’re either going to love the seasoning blend because it’s exactly your taste, or, it will be too spicy for you, or not spicy enough. And of course this can be true of any blend except too much or too little of the spices that you like. Anyway, the point is that if you know what goes into different seasoning blends, you can make them for yourself at home exactly the way that you would like it to be instead of eating it the way that someone else thinks is perfect. Now, don’t get me wrong, I do think spice blends are convenient like I said. Not only that, but I also do understand that not everyone is totally sure how to make a spice blend taste the way that they want it to anyway. But at least if you have an actual recipe, you have a jumping off point. So, with all of that said, here is my recipe for Cajun Seasoning. I hope that you love it – and if not, feel free to adjust it :)
 Ingredients
3 Tablespoons paprika
2 teaspoons cayenne pepper (double this if you like spicy)
1 teaspoon black pepper
1 teaspoon white pepper
1 Tablespoon oregano
2 Tablespoon + 1 teaspoon Kosher Salt
1 teaspoon garlic powder
1 teaspoon onion powder
2 teaspoons celery salt
1 teaspoon dry mustard
1 teaspoon thyme
Instructions
1. Place all ingredients together in a small bowl.
2. Mix.
3. Store in an airtight container
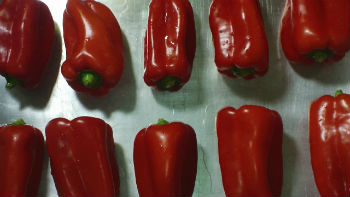
How to Roast a Bell Pepper

How to Roast a Bell Pepper – (instructions with a video tutorial follow) – The other day my husband and I were driving home from our daughter’s ballet practice and I saw a sign for a farmers’ market that read “$10 for 60 pounds of produce”. I do enjoy going to farmers’ markets, but on this particular day, the kids were a little extra tired and needed to eat and so on and so forth so, we drove home. Well, after about five minutes of being home, my curiosity got the best of me and we loaded up the mini-van and headed back to the farmers’ market – yes, I have a mini-van, and, it’s awesome! So, anyway, we got there like ten minutes before they were supposed to be closing up – they were already kind of packing everything. I walked in and paid my ten dollars and I asked the lady “How do we know when we hit the 60 pounds”? And she said “We don’t care, (big smile), just take as much as you want, cases if you want”. And I was like “Really? Cases”? And she was like “Seriously, take as much as you want”. So the next thing I know, I have my poor husband digging through flats of grape tomatoes to find the best one and then pushing a cart around. Not like a shopping cart, but the kind that’s for moving refrigerators and stuff like that. I ended up leaving with a case of watermelon, a flat of grape tomatoes, quite a bit of squash….I don’t know, some other stuff, but most importantly, bell peppers. Twenty five pounds of bell peppers. And they are beautiful – still. I have some of them sitting next to me as we speak. Then on the way home, my husband reaches into the case of bell peppers and takes one out and takes a big ole bite of it (like it was an apple). I look at him like he’s crazy (like most people would although I guess you eat them raw on a veggie tray anyway). And then, he holds it in front of me and is like here try it. So, I take a bite and much to my delight, it was the sweetest most yummy bell pepper I have ever had. Yay! So of course I got all excited to get home and cook with them, which I did. But then, I started realizing that we had a lot of bell peppers to go through. The point is, the next few recipes that go on my site are going to involve roasted bell peppers and I don’t want to start every recipe with how to roast a bell pepper because that could get boring, so I thought I’d do a culinary 101 for everyone on “How to Roast a Bell Pepper”. Also, I’d rather everyone actually roast the bell peppers then buy them in the jar. It’s not hard, you’ll see.
 Ingredients
red bell peppers, that’s it
Instructions
1. Place your bell peppers on a sheet pan (cookie sheet). If you don’t have a sheet pan, you can use a casserole dish or a roasting pan, it’s no big deal. Also, get out a large bowl, not one that will melt, but either stainless steel or a glass one along with some plastic wrap and set them to the side.
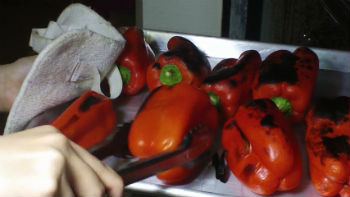
2. Put the pan of peppers under the broiler in the oven. They should be on the top rack of your oven unless they touch the heating element in which case you’ll need to put them down a rack lower.
3. Keep the oven door open just enough where you can look in. Most ovens have a spot where the door will stay around four or five inches open. The point of leaving the door open is more so that you don’t forget about your peppers in there because it’s easy to walk away for too long. So, don’t walk away, stay there and baby-sit a pepper-sit, your bell peppers. 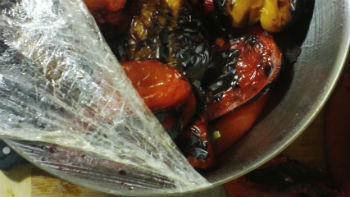
4. When one of the sides turns black (the side closest to the broiler), turn the pepper a quarter of the way. Then, when the next side is black, turn the pepper by a quarter. Do this until the skin of the bell pepper is black all the way around.
5. Remove the bell peppers from the oven and place them into the bowl that you got out earlier.
6. Cover the bowl with plastic wrap as fast as you can. We are trying to trap the steam from the bell peppers.
7. Let them sit in the bowl, covered with the plastic wrap for at least 15 minutes. You can let them sit longer if you happen to be doing something else, but I wouldn’t leave them for more then 40 minutes for sanitation reasons.
8. Remove one pepper from the bowl and place it on a cutting board or plate. Be careful because they are probably still hot or may have hot juices inside. I wear gloves for this part. 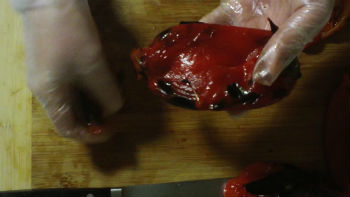
9. Gently remove the blackened skin. Then, hold the pepper upside-down and pull the stem off. When you do this, some juice and seeds will come out.
10. Open the pepper up and remove all of the seeds. Your pepper is now roasted and ready to use.
Keep scrolling for the video tutorial.
How to Choose a Bell Pepper
No matter what color bell pepper you are shopping for, look for peppers that have deep, vivid colors, are heavy for their size, have a smooth, wrinkle free texture, and only push in slightly when you squeeze them softly.
A little extra information on bell peppers
Bell peppers are fruits….well botanically speaking because they contain the seeds of the plant. However, as far as the kitchen goes, they are generally treated like vegetables. They originated in Mexico, Central America, and Northern South America and made their way around the world from there on trade ships and such back in the 14 and 1500′s. Of course, they have lots of other names through out the world including capsicum and paprika. Bell peppers are a member of the Capsicum genus – Why do we care? Well, members of the capsicum genus produce the chemical capsaicin and capsaicin is the chemical in peppers that makes them hot. The higher the level of capsaicin, the hotter the pepper. However, bell peppers are the only member of the genus that don’t produce any capsaicin. So do we still care that they’re in that genus – a, yeah, now you can answer that question if you’re ever on Jeopardy or you can impress your friends at the dinner table. OK, so how about some nutrition facts. Red bell peppers are high in vitamin A and vitamin C, they have around 209mg of vitamin C compared to about 70mg in an orange. I should note here though that cooking will destroy at least part of the vitamin C. So, if you want to get all the nutrition, raw is better. Bell peppers are also high in carotenoids (a group of antioxidants) including alpha-carotene, beta-carotene, cryptoxanthin, lycopene, lutein, and zeaxanthin. There is a ton more nutrition information out there if you want it. The two links below have some great information, so check them out if you want to know more.
Links for more information
http://whfoods.com/genpage.php?tname=foodspice&dbid=50
http://www.fatsecret.com/calories-nutrition/usda/sweet-red-peppers
Please enjoy this how to video!
Grilled Chicken – Also, a Little Extra About Brines

Brines - A couple of weeks ago I was invited to one of the local high schools to do a cooking demonstration. Before the demo started, I was talking to one of the assistants in the class, Bob. He was super nice. Anyway, he had asked me how to keep chicken breast moist when you grill it and I had told him that I have a really great little brine recipe that I put my chicken in. I had also told him that after the demo I would write the recipe down for him. Unfortunately, I totally forgot. So, Bob, I hope you see this article because I’m going to include that recipe in it. OK, that said, brines marinades and dry rubs are a great way to add flavor to meats and also in some cases help them to retain their moisture. Someone asked me recently if you can marinade, dry rub or brine any type of meat. My opinion on that is simple – you can, but you shouldn’t. Here’s what I mean. If you have something like say chicken breast that you know is going to dry out on the grill, yes, do something about it. Brine it. Or, if you have some beautiful ribs (which do have great flavor on their own) but you want them to be a certain style like cajun. Marinade or dry rub them. So then you ask me, “well, when do you only use salt and pepper?” Which by the way is called “seasoning the meat”. The easy answer is “don’t do anything to meat that doesn’t need anything done to it”. Not to over-simplify. Here’s an example. If you have a delicious filet mignon, you don’t need to do anything but use salt and pepper. You can do more (like a black pepper rub for instance), but you don’t have to. The meat doesn’t need any help and if cooked properly, will be beautiful on it’s own. Another good example is Salmon. It really doesn’t need any help if you’re starting with a nice piece of meat. I know the trend right now is to cover the Salmon in a Teriyaki Glaze, but that’s a glaze, not a brine, marinade, or dry rub. It is also, in my opinion, overdone at this point. 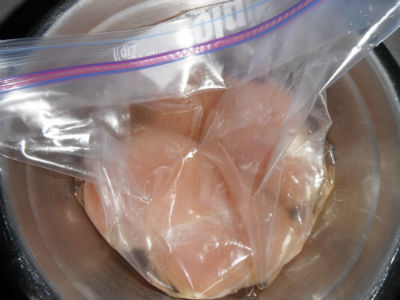 I think every chain restaurant around has one on the menu. I always see the ads – do you think they all chipped in on the same commercial clip :) – it seems like it. OK, I know, off the subject so let’s get back to it.
Brines – Technically, a brine is a cure. Brining is the method you use when you immerse a food (like beef) into a solution (the brine) of curing ingredients (usually salt and/or sugar) dissolved in water. Brines are used to preserve anything from veggies to fruit to fish and other types of meat. They are also used in the process of pickling and of making feta and a few other cheeses. They were used more in the past then they are now as preservatives, but they are still used in this way. Brisket is a good example of a cut of beef that is brined (and somewhat preserved). That’s how we get pastrami and corned beef – yummy! Like when you make pastrami, you can let your beef soak for up to 3 weeks in some cases. I don’t really ever use a brine as a preservative personally but I think I may venture to make my own pastrami one day. I’ll post if I do – of course. But the real reason that I want to talk about brines is that they are great for meat that doesn’t retain moisture well. This is because salt and sugar both retain moisture. I have already mentioned that I do this with my chicken breast. You can also brine (for flavor and moisture) other poultry, pork and beef too. I love, love, love to brine my pork chops. I use a little apple juice sometimes in my pork brine too (am I crossing in to a marinade?, maybe a little), just FYI. So, how do I make my brine for my chicken breasts? Well, here’s my very simple recipe. Also, don’t worry, I’ll do an article soon on dry rubs and marinades :D!
 Ingredients
3 Tablespoons Kosher Salt
1 Tablespoon brown sugar
1 teaspoon cumin (optional, you will be able to taste the cumin in the final dish if you use it (otherwise what would be the point huh?))
2 cups hot water
chicken breast (this recipe is for 1-2 pounds)
Instructions
1. Mix the salt, sugar and cumin if you’re using it into a small mixing bowl.
2. Add 2 cups of hot water and stir to dissolve. Allow to cool (you can also add a few ice cubes to speed things up).
3. Add the chicken breast to the cooled liquid (it doesn’t have to be cold, just not hot anymore).
4. Cover and place in the refrigerator for 2 hours. I put mine in a gallon baggie and then a bowl.
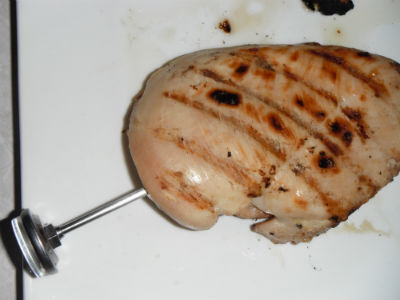
5. Grill your chicken breast until it’s done (internal temperature of 165°). Do not sprinkle it with salt first, the brine took care of that. I usually pull mine off of the grill at about 160°F and put them on a plate and cover the plate with foil to allow them to carry over cook to 165°F. This helps to avoid overcooking. Of course, I am in no way recommending that you under – cook your chicken, I’m just telling you what I do.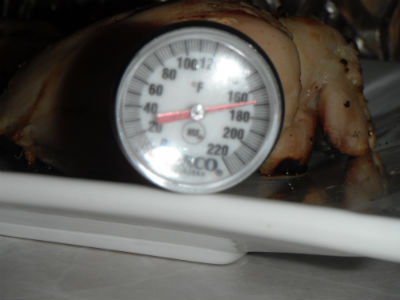 If you’re wondering how you can tell the temperature of your chicken. The answer is easy. Use a thermometer. The way to learn to do it without a thermometer is to take the temperature and then feel it with your finger. Push down and really feel the texture, and how firm it is. Do this often and eventually, you will be able to do it by feel for the most part. I do still recommend checking with a thermometer though until you are super sure of your skills. Also make sure you are taking the temperature in the thickest part of the meat and that the thermometer is in far enough. Don’t stick it in like your stabbing it in the heart, but more like you’re trying to make it into a popsicle. Does that make sense? So like stab it long ways, you know.
6. Now, let your chicken “rest” for a few minutes before you cut into it. You should actually do this with any meat. It allows the juices to redistribute.
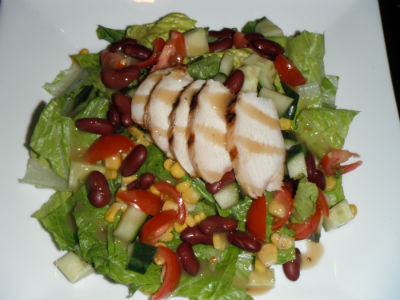
7. Serve the yummy chicken how ever you want. I had a salad with this particular chicken, but this is also how I make my chicken if I’m serving Puerto Rican rice and beans, or arroz con gandules (except I saute it for that), chicken sandwiches, etc, etc, you get the point.
Here’s a picture of my yummy salad I made. It has cucumbers, cherry tomatoes (organic), corn, red kidney beans, the yummy chicken and a little honey dijon dressing. It was super duper tasty!
How to Caramelize an Onion

How to Caramelize an Onion
Caramelizing an onion is a great way to add flavor to a dish. It is also a basic culinary skill. One which we had to master in Basics class, the first class at Le Cordon Bleu. There are just a few steps, patience is required.
1. The first thing you need to do is peel and chop your onions. If you slice them with the grain (from top to bottom) they will hold their shape a little after you cook them and you will end up with pretty curls of onions in say, your French Onion Soup. If you chop them against the grain, or dice them, they will not hold their shape. This is better for things like French Onion Dip.
2. Next, put a little oil into a saute pan. I use about 1 tsp per pound of onions. You can use olive oil, canola oil, veggie oil, or clarified butter. I use olive oil unless it’s a special occasion in which case I use clarified butter.
3. Place your onions into the hot saute pan, sprinkle them with Kosher salt (3/4 -1 tsp per pound) and sweat them on medium-high heat. 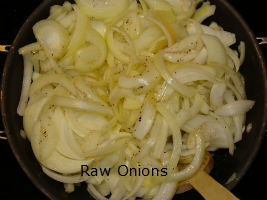
4. Reduce the heat to medium – low and allow your onions to slowly caramelize. The longer they cook, the more flavor you will bring out so don’t be in a hurry. It takes me around an hour and a half to caramelize mine (I like to take it really slow). It should take no less then 45 minutes though. As they are cooking, you will need to stir them occasionally. At least every ten minutes at first and then more often as they cook down. If they start to stick, add a little water, scrape the bottom and stir them (see notes below)
5. When they are a nice deep golden brown, they are done. Remove them from the pan. If you are not using them right away, cool them and store them in an airtight container in the fridge for up to four days.
What Happens When You Caramelize an Onion
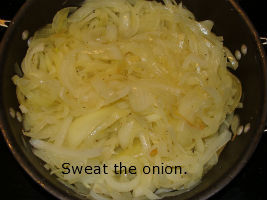 Sweating – (this is not when you work out with your onions) as the onions get hot, the water from inside forces its way out of the onion’s cells, this causes the cells to rupture and the water starts to evaporate (onions are about 75% water by weight), this is what causes them to soften at the beginning of cooking. The onions will begin to have a translucent appearance. This is called sweating your onions. If you have a recipe that says sweat your onions, this is what it is asking you to do. When they are “translucent”, move on to the next step.
As the cells in the onion continue to break down, they release proteins, sugars, and aromatic compounds (mercaptans, disulfides, trisulfides, thiopenes and other long and impressive chemical names too). This is also when you, your hair, and your clothes start to smell like an onion :)! Mmmmm, you smell yummy! 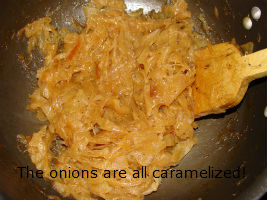
The water will continue to evaporate, and the temperature will continue to rise. When your little onions reach around 230°F they will begin to caramelize. During this time, there are a few things happening. The Maillard reaction begins to take place. This is when sugars, proteins, and enzymes interact and cause browning. It is the same effect that happens to toast and steak. It is not fully understood exactly what happens as there are hundreds of changes that take place so we aren’t going there. Another reaction that is going on is oxidation of the large sugar molecules (sucrose). As they break down more compounds are formed and more flavor is added to your onions. The sucrose (a large sugar molecule), is broken down into fructose and glucose. Fructose and glucose are sweeter on their own then sucrose. So, your onions get sweeter! Yay!
So, here’s a common problem that people run into when they’re caramelizing their onions. The smaller, pieces, and the ends can start to get dark to quick and stick to the pan. There is an easy solution to this. Before I tell you though, I’m going to warn you that a lot of people are going to tell you not to do this. I have done this myself and it works so…. ignore them :D! If your onions start to stick to the bottom of the pan, add a little water and scrape the bottom of the pan then stir them up. This is not for when you’ve burned them beyond recognition, but for when they are beginning to stick and are brown (not black) on the bottom. The reason this works is that the brown that’s stuck to the bottom of your pan, the over browned edges and the little pieces are brown and sticking from water-soluble, sugar based compounds that have been concentrated into one area. When you add the water and scrape and stir, you redistribute these sugars evenly. You can add water whenever it is needed, but if you find yourself constantly adding it, your heat is too high. Onions should be caramelized on medium – low for best results. There are ways to speed up caramelization like adding baking soda (which makes them break down faster and therefore release their sugars faster etc….etc….). You can also caramelize some table sugar and add it. I don’t recommend either of these things though. I think they come out nicer doing it the slower way. It’s your choice though. I’m not even eating at your house tonight :)!
Oh, one more thing. Which onions are best to caramelize? At first, you may think that obviously the sweet onions would be better right? Well, sweet onions do contain about 25% more sugar, but it is the lowered amount of lachrymators ((Propanethial S-oxide) the chemical that makes you cry) that make them have a sweeter taste. The lachrymators, when cooked, develop into more complex flavors, so the other varieties have a distinct advantage. It has been my experience that they caramelize about the same, but you get better flavor when using yellow, brown or red. I use a combination of the three when I make my French Onion Soup. I would also like to add that brown and yellow, in my opinion, get the prettiest color. The red ones turn a weird grayish green. They taste good though, so I still add them in.
So, now you have the basic information that you need to make perfectly caramelized onions. Have fun and make lots of delicious dishes! Happy Cooking :D!
Please enjoy this “how-to” chop an onion video!
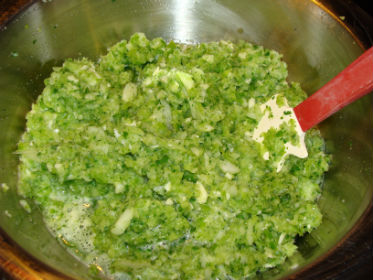
Sofrito

Sofrito – This is the beginning of lots of different Puerto Rican recipes. I have it in the ones you need, but didn’t want anyone to have to search all over the site to find it if they wanted just the sofrito. This will make way more then you need, I make a huge batch in my food processor and freeze it in one cup portions. Feel free to scale this way down (divide by like 4 or so) especially if you don’t have a food processor. I do recommend making the extra and saving it if you have a food processor though. You are going to want to make this again and it will save some time for future recipes! Happy cooking!
 Ingredients for the Sofrito
2 bulbs garlic
2 onions
5 green bell peppers
1 bunch recao
or if you can’t find recao, cilantro
Instructions for the Sofrito
1. Peel the garlic and pulse in a food processor until it’s minced, put it in a large bowl.
2. Slice the bell peppers down the sides. Be careful of the seed packet (throw the seeds away along with the stems). Pulse the pieces of bell pepper in the food processor until they’re minced.
3. Add the minced bell peppers to your bowl of garlic.
4. Peel and quarter the onions, pulse them in a food processor just a few times then add the cilantro, pulse until the onion is minced.
5. Add the onion and cilantro to the garlic and bell pepper mixture.
6. Stir everything up to combine it.
You now have the beginning of tons of Island Dishes. Beautiful Sofrito. At this point I freeze it into one cup portions in baggies for future use. It’s a great time saver.
Please enjoy this “how to” video!
Champagne and Sparkling Wines

It’s that time of year again everyone, Yay!!! Time to break out the Champagne and Sparkling wines (not that I wait until this time of year)! :D ! I’m super excited anyway though! I just love how happy and fuzzy everyone is right now! Is it all the drinking :)?I have a very deep love and passion for wines too. I know they can be a little intimidating or confusing for a beginner though (I was there once too). So, here’s a quick Champagne/Sparkling Wines 101!
What is the difference between Champagne and a Sparkling Wine?
Champagne is both a province and a wine. To be called “Champagne”, the wine must come from the Champagne region of France. Yes, I realize that you have seen a wine with the word Champagne on it that wasn’t French. This happens for two reasons. The most common is that there are French Champagne houses in California – ones that began in France or are owned by one in France. The other is that the producer doesn’t care that Champagne is a province where Champagne comes from and they put it on their label anyway probably in hopes of getting a higher price for their product. I’ve read that there is an international treaty that prevents places other then Champagne from using the name Champagne, I don’t think this is entirely accurate though. However, within the European Union, only wines from the Champagne region can use the name.
Where do the bubbles come from?
So, in really simple terms. Winemakers take grape juice and add yeast (or use the natural yeast that is already there). They put it in a barrel. The yeast “eats” the sugar in the juice. The yeast then “poos” alcohol, bubbles, and heat – but in a good way. This is the easiest way for me to look at it. This is the first fermentation. This is how a still wine (wine without bubbles) is created. The still wine then goes through a second fermentation to add the bubbles. Generally the winemaker will add more sugar and yeast to start the second fermentation. This second fermentation will have one of three fancy names.
1. Methode Champenoise (method Shahm-pen-WAHZ)- this is the traditional French method. The first fermentation takes place in the barrel, the second in the bottle. During the second fermentation the bottles are kept on a rack that keeps them angled down. They are turned 1/4 turn or so daily. This process is called riddling in English or remuage (pronounce reh-moo AHJ) in French. Riddling helps the sediment (little dead yeast corpses) find their way to the neck of the bottle. When the fermentation is done, they freeze the neck and pop off the bottle cap that is there for the second fermentation. The ice cube pops out (there is a lot of pressure there), they top it off and they put a cork in it. They then put that pretty foil wrapper around the top (to hide inconsistent liquid levels) and label it. Pretty simple right?
2. Methode Traditionale – this is the same as Methode Champenoise, only we use this term in America.
3. Charmat (pronounce shar mah) Process (also called Cuve Close, bulk method, tank method)- in this process, the bubbles are added basically the same as they are in soda. The fermentation is done in bulk in big steel tanks. This results in bigger bubbles and is usually used for less expensive wines. These wine are generally good choices for mimosa, Bellini and punches. If you’re going to cover the flavor anyway, why spend a ton of money?
If your bubbles are small and flow upward in a continuous stream you probably have a wine produced by Methode Champenoise. If your bubbles are large and float more random, they were probably made via the Charmat Process. Small scratches in your glassware can also effect the bubbles. We used to scratch a small x at the bottom or our wine glasses in the restaurant because it makes the bubbles flow from the bottom and kind of spiral up. It’s prettier ;).
How do I know if it’s going to be sweet or not?
Read the label silly :). This is a list from driest to sweetest.
Brut (rhymes with root) – driest
Extra Dry – a little less dry then Brut (I don’t know why, and yes, it doesn’t make sense)
Sec – dry
Demi Sec – off dry
Doux – Sweet
By the way, I think I should mention here that the wine term dry means there is no sweetness or sugar. I think a lot of people confuse this with tannic. Tannic is when it dries your mouth out, like if you put a tea bag in your mouth (try it) it makes your mouth feel dry like it’s sticking to itself. Also fruity does not equal sweet. A wine can be totally dry and still be fruity. Again this has nothing to do with the sugar level and everything to do with the other acids present in the wine. We’ll save all that for another day though. So just to be ultra super clear, a wine cannot be dry and sweet at the same time. OK :) .
What do Blanc de Blancs and Blanc de Noir mean?
Blanc de Blanc – This means white wine from white grapes. In other words, it’s likely made from Chardonnay grapes. These are very versatile and good with lots of foods.
Blanc de Noir – This is white wine made from black (red) grapes. Most likely from Pinot Noir or Pinot Meunier grapes.
If you come across a sparkling rose, it is most likely a blanc de blancs with an addition of still pinot noir just before corking.
What is NV or MV?
NV stands for non-vintage, and MV stands for multi-vintage. They are the same thing. If you are drinking a non-vintage wine, this means it is a mix of different harvest years. Champagne is almost always blended both of harvest years and of grapes to maximize complexity and consistency. Each component brings a unique character to the finished wine. The non-vintage is usually the “calling card” of a producer. Non-vintage also usually makes up the bulk of their production. If there is no date on the label, you’re drinking non-vintage.
What is Vintage?
When a growing season makes beautiful grapes, producers like to bottle them as a vintage. A vintage comes from one growing season and is not blended from multiple seasons of grapes. It shows off the characteristics of a specific year. They are more rare and more expensive. I wouldn’t say that they are always better though, just different. If you are drinking a vintage, there will be a date on the label.
What should I use to make mimosas, Bellini and punches?
I have had people tell me that if you wouldn’t drink it alone, don’t use it as a mixer or to cook. I have to disagree very strongly with this. I recommend using a less expensive sparkling wine as a mixer somewhere in the five dollar range. I might even go as high as seven dollars. If you are pouring a 40 dollar bottle into a punch bowl, you are wasting it! Sorry, but you are. The taste is hidden behind all the juice and whatever else you have in there. You lose the flavors that you paid extra for. The same goes for cooking, please don’t use a beautiful 40 dollar bottle of wine in a sauce, it is going to cook and you are going to lose all the subtle flavors that made it worth 40 dollars in the first place! Save your nice wine to drink by itself or with some delicious food that compliments it!
This should be enough info to get you through the wine store and past the snobby sales person. So, get out there and pop those corks, and next time don’t wait all year!
The Cookie Method – How to Properly Mix Your Dough :D!

What is the cookie method you may ask? Well, let me tell you. The cookie method is the fancy (or not so fancy depending on how you look at it) way that professional chefs say “how to mix your cookies right”. There are three different ways of mixing including; the one-stage method, the creaming method (this is the one we will be concentrating on the most today), and the sponge method. Here is a brief overview of each.
The One-Stage Method-This method is not used very much because the baker has less control over the mixing than with other methods. However, when you are making a recipe where over-mixing isn’t going to be a problem, like with chewy cookies, this method can be used. The basic procedure goes like this- Measure all of your ingredients. Let them all come to room temperature. Put them in a mixer all at once and mix them until they are uniformly blended. Make sure your’e scraping the sides of the bowl now and then so you don’t end up with clumps of flour in your cookies because that’s disgusting. Mmmmm flour clumps-not! This method is simple and quick and even a child could do it. It is good for macaroons, some bars and a few other recipes. So moving on….
The Creaming Method- Although I’ve never googled this fact or anything, I think it is safe to say that this is the most commonly used method of making cookies. It is what you use when you make chocolate chip cookies, sugar cookies, oatmeal raisin cookies and several others. The amount you “cream” will affect your cookies texture, the leavening and how much it spreads. You should only cream a little if you want your cookies to hold their shape (you don’t want to loose the edges on those pretty Christmas Trees). If your cookie is short (chef talk for “high in fat and low in gluten development”) or if you are making one of those very delicate thin cookies, too much creaming will make your cookie crumble-literally. So here is the basic procedure;
1. measure all of your ingredients
2. let them come to room temperature
3. put the fat, sugar, salt, and spices into the mixing bowl and cream them on low speed
*note that you can also blend your spices and salt into your dry ingredients
*for lighter cookies, cream until light and fluffy, this incorporates more air for leavening
*for denser cookies, cream to a smooth paste, but do not cream until light
4. add the eggs and any liquid and blend at low speed
5. blend in your dry ingredients (flour, baking soda, baking powder)
*mix just until combined, you’re making cookies, not bread
The following video is The Creaming Method, it is for small at home cookie batches. If your recipe requires more than 2 eggs, I recommend adding 2 at a time and blending a little in between additions.
If you follow these basic steps, you should come out with a pretty nice cookie in the end. If your cookies still are coming out like crappies, check out the “what’s wrong with my cookies” at the end of this article. And last but not least…
The Sponge Method-This procedure can vary considerably, depending on the ingredients you’re using. The batches should be kept small because the batter is super delicate, in other words, don’t double recipes that require this method because your cookies won’t come out. This method is generally used for meringue cookies.
1. measure your ingredients
2. let them come to room temperature (for greater volume warm your eggs a little)
3. whip your eggs and sugar together until the desired consistency
*soft peaks if you’re only whipping whites, thick and light if you’re whipping yolks or whole eggs
4. fold in the rest of the ingredients according to the recipe
*do not over-mix or deflate your eggs
AAAAAAAHHHHHHH – What’s Wrong With My Cookies
So, you’ve followed all the advice, you’ve measured and re-measured, but for some reason, you still can’t make a decent cookie. There are a few common mistakes you may be making.
If……
your cookies taste bad- I would first of all check your ingredients, make sure nothing is expired or spoiled. Also, maybe switch brands. Then ask yourself these questions – Did you forget one of the flavoring ingredients maybe? Were your pans totally clean or is there some mysterious stuff burned on them that you can’t seem to scrub off? Did you measure properly? Is there anything burned onto the bottom of your oven that’s smoking while you’re cooking?
your cookies are tough (and I don’t mean they can take a hit)-you may need to switch flours-did you use a bread flour? That is a cookie no-no. Try a more delicate flour, AP flour is good for most, but you can try a pastry flour too.
your cookies stick to the pan- you may have used too much sugar or you need to grease your pan, silly.
your cookies are crumbly-you may not have mixed them properly. This could also be a problem with the recipe such as not enough eggs, or too much sugar, shortening or too much leavening. If you’re not a professional, I don’t recommend trying to adjust the recipe because ingedients are expensive, time is precious and there are plenty of other cookie recipes in the sea.
your cookies are too brown-you are likely baking them too long or at too high of a temperature
your cookies are not browning-most likely they need to bake longer, you may need to raise the temperature, or there may not be enough sugar in them, this can happen when using a sugar substitute also
your cookies have a sugar crust-either you didn’t mix them right, or there’s too much sugar
your cookies are hard-you probably baked them too long or at too low of a temperature. The recipe could also be off. If they still taste good tell everyone you were trying a new shape for biscotti and have them dip them in milk or coffee.
your cookies are dry-you probably baked them too long or at too low of a temperature, it could also be the recipe. Again if they taste good go with the biscotti story.
your cookies spread out too much-this could be from too low of a baking temperature, not pre-heating (shame on you, you know your recipe said to pre-heat and if it didn’t, well now you know for next time), you may have over greased your pan, just calm it down a little next time and don’t get crazy with the spray, you may also be over-creaming
your cookies don’t spread (and they should)-you may have your oven temperature too high, you may need more grease on your pan, your recipe may be off
I hope that after reading this article all of your cookie dreams come true. Happy baking!
Table Salt – Strangely Not for the Table

In my childhood and, I suspect in most of yours, I was trained to use the iodized salt that comes in the blue cylinder. You know the one. It wasn’t until I was about 20 that I found out about Kosher salt and not until Culinary school that I found out about all the other wonderful salts out there. So, I thought today I would give everyone some salt basics. With just a few simple tips you will see a change in your cooking.
First lets talk about what salt is. Salt is a chemical compound (NaCl – Sodium Chloride) that occurs naturally in the Earth. All of us come equipped with taste receptors in our mouths to enjoy it with. It is important in food preservation, and it also makes food good. I would go on about the chemistry behind salt and where it’s collected, but you may not all be food nerds like me. If you are into the chemistry check out my recommended books and choose one on food chemistry. And now moving on……..
There are 3 very basic salts that no kitchen should be without, good old fashioned table salt, kosher salt, and sea salt. They all have specific and practical uses
-Table salt (can be iodized or not) is very small and has a smooth texture. It melts quickly on hot food and dissolves easily in water. I had a chef in culinary school who I think about every time I boil pasta. He would come around and taste our cooking water and he would say ” How salty should this be? As salty as the salty sea!” (you have to say the answer loud and with a heavy French accent). He was right though. If you want to see an immediate improvement in the taste of your boiled pasta or potatoes, salt your water. I’m not talking about a little bit of salt like I was shown as a little girl. I’m talkin’ like SALT your water. It should taste like the ocean. I don’t really measure, but I would say that I use somewhere around 1/4 of a cup of table salt to 7 quarts of water. Warning – it is totally possible to over salt you water. I found this out when teaching my kids about salting their cooking water. Our spaghetti tasted like a salt lick, of course my husband and I choked it down anyway because they made dinner. It may be beneficial to you to, just for fun, boil 2 small pots of pasta. Salt one and not the other and then do a taste comparison. You will be amazed by the taste difference. Also try salting the unsalted noodles after they’re cooked. You will quickly see that the best time to salt them is in the pot while they’re cooking. This is when the starch expands and soaks in the flavor. This will also give you a better understanding of the importance of salting your water. The other main use for table salt is fried food. You want to sprinkle it over your fried food immediately when you take it out of the oil. The heat from the oil will help it melt and it will make your food yummy. No real trick to the amount, just start with a little, taste it and if you want more, add it. One note about table salt is that it comes both iodized and regular. The iodized has iodine added to it. This is a necessary nutrient that some of our diets lack – easy solution, use iodized salt.
-Kosher salt is the most common in professional kitchens. It is larger then table salt, has no additives and has a coarser texture. It is used before cooking as well as during the cooking process. This is the salt that you want to be using to season meats before cooking. For example, if you are about to throw a beautiful steak on the grill, just a few minutes before you do, sprinkle it with Kosher salt. Don’t cover it completely, just a light sprinkle on both sides and try to make it even. You don’t want one salty bite and then a bland bite – gross. The best way to accomplish an even sprinkle is to put a little salt in the palm of your hand and pinch and sprinkle with your other hand. Kosher salt is very easy to “control” this way. You have probably seen chefs do this on television. Also, as silly as this may sound, practice on a plate or something first to get a feel for it and to see how evenly you sprinkle. Add a little ground pepper, flip your steak and do the other side. Once you have added the salt you don’t want to wait too long before cooking because the salt will draw moisture out of your steak. Not a good thing for steak, but for some other things, exactly what you want your salt to do. Kosher salt is also great for just about anything else you cook in the kitchen too. Keep in mind though that most ingredients like salt to be added to them as they are being cooked. With few exceptions, every time you add an ingredient into the pan, it should be followed by a little salt and a little pepper. This helps the ingredients absorb the salt and also helps you evaluate what the final flavor will be during cooking. This does not mean add a teaspoon of salt every time you add something to the pan. Just a light sprinkle, each time, over the new addition. For example, say your recipe says something like saute the onions then add the mushrooms. You would put your onions into the pan with a little salt (and pepper). Saute them until the desired consistency, add your mushrooms along with a little salt and then the next ingredient and so on. You get the idea right? Oh, and taste the food as you cook to check your seasoning (not if there’s raw meat in it please). One person who overrides the salt as you go rule is your doctor. If you have been advised to use less salt in your diet, listen to the Doc and not me. So I bet your wondering by now, is Kosher salt really “Kosher”? The answer is YES it is! Kosher salt meets Jewish eating requirements.
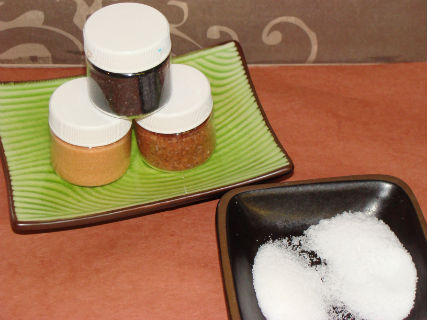
Salts in My Cabinet
-Sea salts can come in either beautiful little flakes, or crystals and are prized by chefs. There are two common methods for how sea salt is “harvested”. The traditional technique involves sea water being collected into shallow basins. It is then left there to evaporate from the heat of the sun. The salt on the bottom is affected by the clay or other substrate that is on the bottom of the basin. This often causes unwanted discoloring. Take note here that there are many salts that have color for other reasons that are desirable.The salt that forms higher up in the basin and has not had contact with the bottom stays pure white. This is where the more expensive “fleur de sel”comes from. I always tell people that sea salt is for finishing a dish and for using at the table. This is where it’s flavor can be most detected and appreciated. If you are wondering if you can use sea salt for cooking in place of Kosher – yes you can in most cases however it is not necessary and is cost prohibitive for most of us. My two absolute favorite sea salts are Maldon from England and Fleur de Sel Camargue French sea salt. You may also want to check out a “starter set” of salts that offer a variety of different sea salts.
OK. Now that you know your salts, let me just give you a few extra pointers.
-use a little less salt then normal if you will be adding a salty ingredient later like soy sauce or parmesan cheese
-the more you reduce a sauce or a soup, the more concentrated the salt becomes
-when you add salt, it draws out moisture, this can be good or bad depending on what you’re trying to do
-most importantly, have fun when you cook, food cooked with love always tastes better
Happy Cooking!