


I’m one of those people that every time I pass the cookies, I break off a little piece. So, by the end of the day I’ve eaten like five cookies. I guess that’s not too bad. It is however why I only make cookies like once a month or so. After all, I’m the one who is home all day listening to the cookies beckon me from the cabinet in their sweet little cookie voices – Alicia, come eat us, we’re so delicious. I try to be strong – “Quiet cookies” I yell back :D. They don’t listen though and eventually I give in. Mmmmmmmmmmmmmmm, so good!
Nothing beats a delicious homemade cookie!
These are some of my very favorite cookies :D! There are lots more to come – I’m kind of a cookie fiend :D!
Recipes
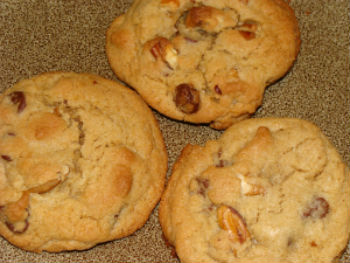
The Best Chocolate Chip Pecan Cookies Ever
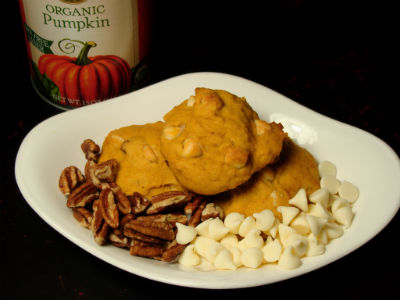
Pumpkin Pecan Cookies with White Chocolate Chips
Banana Cookies with Peanut Butter Chips
White Chocolate Peppermint Cookies
Ninjabread Men – Gingerbread with a Kick – WA-GA!
Peanut Butter and Jelly Cookies (whole wheat)
Christmas Cookies (traditional and whole wheat)
Choco-Latte Cookies (whole wheat)
The Best Chocolate Chip Pecan Cookies Ever

The best chocolate chip pecan cookies ever – (recipe follows) – There is one thing that I think all… or at least most of us have in common and that is the love of chocolate chip cookies. Actually, for me, chocolate chip cookies happen to be extra special, near and dear to my heart because they are the first thing that I learned how to bake totally on my own without being a “helper”. Sorry, that sentence is confusing, I didn’t teach myself to make them, my Grandma taught me. What I was trying to say is that chocolate chip cookies are the first thing that I could bake on my own – after being taught. Yeah! Of course, like a lot of Grandmas, mine used the recipe on the back of the Nestle Toll House package. It’s not a bad recipe, and I’m definitely not knocking it in any way. It’s actually a great way to learn “The Cookie Method” and anytime I want to have “Grandma’s Chocolate Chip Cookies”, those are the ones that I make. Just as a little side note, do you all know the history behind that recipe? It’s kind of cool. I should say here first, that there are variations to this story, but this is what is most common – There was a woman named Ruth Wakefield. Her and her husband purchased an inn in Whitman, Massachusetts in 1930. They named it “The Toll House Inn” – bet you didn’t see that coming :). Ruth did a lot of baking for the guests and loved to improve on old colonial recipes. One day, she was making her butter drop dough cookies, and decided to add some chocolate to them. She chopped some small pieces off of a Nestle Chocolate Bar, and added them to the cookies. (Another version of the story is that she was making chocolate cookies, and ran out of bakers chocolate and decided to add the Nestle pieces expecting them to melt and mix in in the oven- hmmmm, I don’t know, if she baked, I would think she knew they wouldn’t “mix in” in the oven). Anyway, the cookies became super popular at the inn and eventually, her recipe was published in the Boston newspaper. Of course this made sales of the chocolate bar go up. There is also the story that the cookies were being sent over seas to the men who were from Massachusetts and fighting in the war and they were sharing them with others and then all the men were writing home asking for more cookies which made the recipe become even more popular. I think it was probably a combination of both. So, Ruth and Nestle got together and made an agreement for Nestle to be allowed to print her recipe on the back of their chocolate bar – a deal which included free chocolate for Ruth to make the cookies for the rest of her life. As the popularity of the cookies and sales of the bar grew, Nestle wanted to make it easier for everyone to use their chocolate for cookies. At first, they scored the chocolate and packed it with a special chopper to chop the chocolate small. And then, in 1939, The Nestle Toll House Chocolate Chip was born. Oh, also, Ruth had a recipe book out, it was called “Toll House Tried and True Recipes” and it was published in 1936. The book has the original recipe for the chocolate chip cookies except they are called”Toll House Chocolate Crunch Cookies”. Awesome right? I think so too. So, now that you’ve had a quick history lesson on how chocolate chip cookies came into the world – thanks Ruth, lets make another version – after all, you’ve tried the Toll House Ones Right?
 Dry Ingredients
3 cups AP flour
1 teaspoon Kosher salt
1/2 teaspoon baking soda
1/2 teaspoon baking powder
Other Ingredients
1 cup brown sugar
1 cup white sugar
2 sticks butter
2 eggs
1 teaspoon vanilla 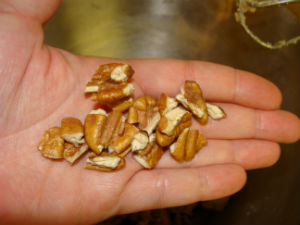
1 1/4 cups chocolate chips
3/4 cup pecans (if you don’t like pecans, substitute something like walnuts, white chocolate chips, or more chocolate chips, just make sure to add something for the 3/4 cup)
Instructions
1. Get your butter out and let it come up to room temperature.
2. In a small bowl, measure all of the dry ingredients, then stir them with a fork or a whisk to make sure they’re evenly combined.
3. Pre-heat your oven to 350°. 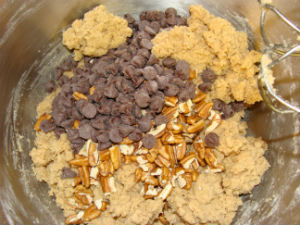
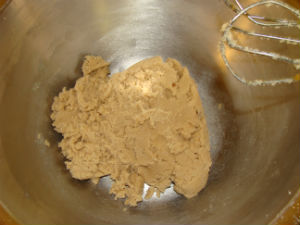
4. In a large bowl, cream the butter and sugars. Scrape the bowl with a rubber spatula making sure to get the bottom and the sides, then mix for a few more seconds to get any chunks of butter that may have been hiding mixed in.
5. Add the eggs and mix to combine.
6. Add the vanilla and mix to combine. Scrape the bowl with your rubber spatula again.
7. Add in the dry ingredients, 1/3 at a time mixing in between each addition. 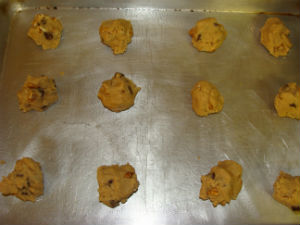 Scrape the bowl with your spatula, again, make sure to get the bottom and the sides. Mix just for a few more seconds to get any dry ingredients that you may have scraped from the bottom or sides.
9. Stir in your chocolate chips and your pecans – or whatever you choose to substitute for your pecans. I use my hand mixer to do this, but you can use a rubber spatula.
10. Place your cookies on a prepared sheet pan a scoop full at a time. I’m using a number 20 scoop which is equal to about 3 Tablespoons. To prepare your cookie sheet, you can use either cooking spray, or parchment (wax) paper. You can also use a silpat. 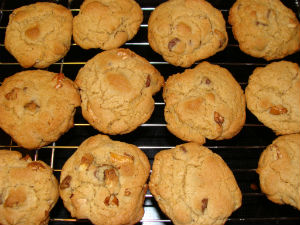
11. Bake your cookies at 350°F for about 14-16 minutes. I rotate my pan half way through the cooking time.
12. Remove the cookies from the oven and allow them to set on the cookie sheet for about one minute and then you can move them to cooling racks. Enjoy your delicious chocolate chip pecan cookies :)! Soooooo good!
Store them in an airtight container.
Here’s a great tip for storing your cookies – put a piece of bread in the container with them. It will keep them softer longer. I have even added a piece of bread to cookies that were getting a little hard and something magical happened – they got a tiny bit softer – Yay, cookie magic!
 Please enjoy this “how-to” video!
Pumpkin Pecan Cookies with White Chocolate Chips

Pumpkin Pecan Cookies with White Chocolate Chips – Have you ever eaten a cookie thinking “I’m going to eat one cookie, then, no more today”? I have. I have this strange relationship with cookies. We can’t really be in the same room together or one of us becomes a snack (the cookie, not me). I’m not sure exactly what the weakness is, it’s not the same for me with all desserts or snacks. No, just cookies. Mix that with the fact that these cookies have pumpkin in them, which is one of my very favorite flavors on the planet, and the result is…..well, the result is me eating like four or five cookies a day. I can’t help it either. I try to be stern with the cookies, but they don’t care. They just call to me from the kitchen in their sweet cookie voices (also high-pitched, I don’t know why, maybe because they’re small) “Alicia, come and eat us”. And I tell them “quiet cookies”. But alas, here I am, typing this recipe and eating one of these cookies. That’s OK though because I’ve convinced myself that these cookies are healthy. Not like healthy, healthy like low-fat and all of that stuff, but healthy like they have pumpkin in them. For crying out loud they have to have some kind of vitamin content and fiber- right? Yes, I think so. Plus, cookies make people happy. Being happy is very important to your overall health (some study somewhere at sometime said :D) and pumpkin is definitely good for you, therefore, by reason, pumpkin cookies are good for you. I think I’ll have another. You see, you see how devious the cookies are. They get into your head. BAD COOKIES! No, no, you’re not bad, you’re good, I love you cookies. :D Happy Cooking everyone!
Ingredients
dry ingredients 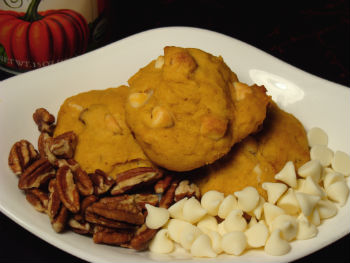
3 cups AP (all purpose) flour
1 teaspoon baking powder
1 teaspoon salt
2 teaspoons pumpkin spice *see note
2 sticks butter
1 cup brown sugar
1/2 cup white sugar
2 eggs
1 1/2 teaspoons vanilla
15 ounce can pumpkin puree
1 cup pecans
1 1/2 cups white chocolate chips
If you’re new to making cookies, I’d like to invite you to read my article and watch a short video “The Cookie Method – How to Properly Mix Your Dough :D! ”
Instructions
1. Bring all of your ingredients to room temperature. At least make sure that your butter is soft. This helps everything blend together better. 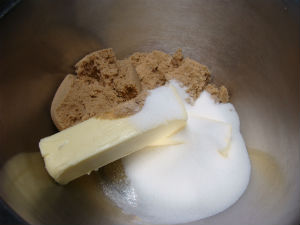
2. In a small bowl, combine all of your dry ingredients (flour, baking powder, salt).
3. Pre-heat your oven to 350°F. (I don’t usually do it at the beginning of the recipe because then it just sits there wasting electricity and making the house too hot :).
4. In a large bowl, cream the butter and sugar. Scrape the bowl with a rubber spatula making sure to get the bottom and the sides really well. It is important not to leave any chunks of butter behind.
5. Add the eggs into your creamed butter mixture and mix until well combined. If you happen to be doubling this, add the eggs two at a time and mix in between additions.
6. Add the vanilla and the pumpkin puree and mix until well combined. Scrape the bowl with a rubber spatula, again, make sure to get the bottom and the sides.
8. Add in half of the dry ingredients. Mix until just combined. Scrape the bowl. Add in the other half of your dry ingredients and mix just until combined. Don’t over mix once you’ve added the dry ingredients. Over mixing causes your flour to develop gluten strands and makes your cookies tough.
9. Stir in the white chocolate chips and the pecans. Just as a side note, you can buy pecan pieces instead of pecan halves which and they are less expensive. It makes more since to buy the pieces for this recipe since you will have to break them up anyway if you buy the halves.
10. Drop by spoonfuls onto a parchment lined sheet pan (cookie sheet). You can also use a Silpat if you have one or use cooking spray or butter.
11. Bake until they’re done. Mine took about 12 minutes at 350°F. They don’t really brown much on top (or shouldn’t), but the bottoms will brown, so watch the sides of the cookies for signs of browning.
12. Remove your delicious pumpkin pecan cookies with white chocolate chips from the oven and let them set on the pan for about one minute.
13. Transfer them to a cooling rack and allow them to cool.
14. Enjoy your awesome, delicious cookies, you deserve it! Also, keep reading for a little more info on the health benefits of pumpkin.
 Here’s a little extra information about pumpkins and their nutrition and health benefits – just in case you wanted to know.
Did you know that a pumpkin is a fruit? Yep, it is. There is a really easy way to tell if you have a fruit or vegetable. Fruits have seeds, veggies don’t. But what about tomatoes and zucchini and cucumbers? They’re fruits too. Yes, even tomatoes – even though there is a whole legal thing about tomatoes being a veggie. I’ll get into that another time since we’re talking about pumpkin here. So, pumpkin is rich in vitamin A. Vitamin A is an anti-oxident. It is great for your skin and vision and believed to lower risk of lung cancer among other benefits. Pumpkin also contains the vitamin B-complex group of vitamins like folates, niacin, vitamin B-6 (pyridoxine), thiamin and pantothenic acid. Not to mention vitamin C, and E. It is also a source of the minerals phosphorus, calcium, copper, and potassium. It is low in calories and contains no saturated fats or cholesterol. It also contains other flavonoid compounds which are also anti-oxidents and have tons of benefits. They have been shown as “anti-aging”, they help protect your eyesight (zea-xanthin), the list goes on and on. If you would like to know more about the benefits of pumpkin, I encourage you to just google it because there is a ton of information out there. Just make sure you’re at a reputable source like mayoclinic.com or USDA.gov. See, I knew that they were “healthy” :).
Banana Cookies with Peanut Butter Chips

Banana Cookies with Peanut Butter Chips – (recipe and instructions follow) – One of my very favorite things to eat as a little girl was bananas with peanut butter smeared all over them. OK, that’s half of the truth….um, not that it was a lie. It’s just that bananas and peanut butter weren’t just a child time favorite I still love to eat them. I don’t know what it is about the flavor combination, but it’s so, so yummy. Here’s kind of a cute story. When I was little, I had a cookbook. It was one of those ”my first cookbooks” and had Humpty Dumpty on the front. It’s copyright is 1978, so that puts me right around the age of two when I got it. I used to cook out of it all the time and I really thought that I was awesome because I could follow the recipes (they had picture instructions). Wow, is it weird that I remember something that far back but often forget where I put my car keys. Anyway, I just think it’s cute now because when I look through that old cookbook (yes, I still have it (I’m going to pass it down to my daughters when they have babies) the recipes are so simple. Like I said, I really thought I was making something special. Anyway, one of the recipes in there was bananas with peanut butter on them. They also had the option of using mayonnaise instead of peanut butter. I never tried that one and still probably won’t – well maybe just to try it. Sorry, I’m off track here. So, I was at the store the other day stocking up on my Christmas Cookie baking supplies and I saw this huge bag of Reese Peanut Butter Chocolate Chips. The front of the bag has a picture of a big chocolate cookie with the peanut butter chips in it and I thought MMMMMMMMMM that sounds sooooo good. I’m a sucker for Reese cups, again, a childhood favorite. So I decided to get some. But then, as I was walking through the store, I was thinking about my site and all of you and I stated thinking “I bet everyone makes chocolate cookies with peanut butter chips with these”. And then I decided to be a little more original and try to give you something that isn’t all over the net already (which is what I always try to do). So then I started thinking, “what goes good with peanut butter besides chocolate”. And guess what sprang to mind. That’s right, bananas. And that is when my banana cookies with peanut butter chips were born – or at least the idea of them. So, when I got home, I sat down at my dining room table (while the babies were napping), and I wrote this recipe. When they woke up, we made them and…….they came out super duper amazing and yummy, in my humble opinion :). Enjoy everyone and happy cooking!
Ingredients 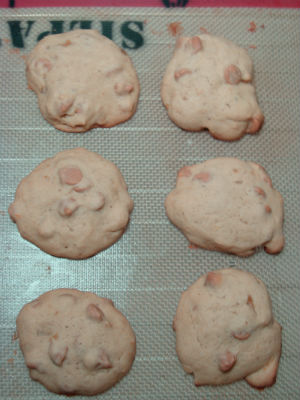 dry ingredients
3 cups AP(all purpose) flour
1 teaspoon baking powder
1 teaspoon salt
2 sticks butter
1 cup brown sugar
2 eggs
1 1/2 teaspoon vanilla
1 cup mashed bananas (about 2 medium bananas)
Just as a side note, I like to use bananas that are super ripe. They should have lots of brown spots and smell like yummy sweet bananas. Just don’t let them get too ripe – yes, there is such a thing. I let mine sit to ripen for banana bread one time and kept waiting and waiting and they were all the way brown, then when I went to pick them up, I discovered that the one on the bottom was leaking some kind of syrup. I think I may have accidentally made a banana liquor on my counter top :D. Anyway, on with the recipe!
If you’re new to making cookies, I’d like to invite you to read my article and watch a short video “The Cookie Method – How to Properly Mix Your Dough :D! ”
Instructions
1. Bring all of your ingredients to room temperature. At least make sure that your butter is soft. This helps everything blend together better.
2. In a small bowl, combine all of your dry ingredients (flour, baking powder, salt).
3. In a separate small bowl, mash your bananas. You don’t have to mash them into baby food, just mash them with a fork.
4. Pre-heat your oven to 350°F. (I don’t usually do it at the beginning of the recipe because then it just sits there wasting electricity and making the house too hot :).
5. In a large bowl, cream the butter and sugar. Scrape the bowl with a rubber spatula making sure to get the bottom and the sides really well. No butter chunks left behind :D
6. Add the eggs into your creamed butter mixture and mix until well combined. If you happen to be doubling this, add the eggs two at a time and mix in between additions.
7. Add the vanilla and the mashed up banana and mix until combined. Scrape the bowl with a rubber spatula, again, make sure to get the bottom and the sides.
8. Add in half of the dry ingredients. Mix until just combined. Scrape the bowl. Add in the other half of your dry ingredients and mix just until combined. Don’t over mix once you’ve added the dry ingredients. Over mixing causes your flour to develop gluten strands and makes your cookies tough.
9. Stir in the peanut butter chips. I also like to eat a few, they’re so good!
10. Drop by spoonfuls onto a parchment lined sheet pan (cookie sheet). You can also use a Silpat if you have one or use cooking spray or butter. These don’t stick too bad.
11. Bake until they’re done. Mine took about 12 minutes at 350°F. They don’t really brown much on top (or shouldn’t), but the bottoms will brown, so watch the sides of the cookies for signs of browning.
12. Remove your delicious banana peanut butter chip cookies from the oven and let them set on the pan for about one minute.
13. Transfer them to a cooling rack and allow them to cool. Although they are really tasty warm, especially with a nice, tall glass of milk. Just be careful of the hot chips – I said warm, not fresh out of the oven still at 350° :)
14. Enjoy your awesome cookies, you deserve it!
Yield – about 40 cookies

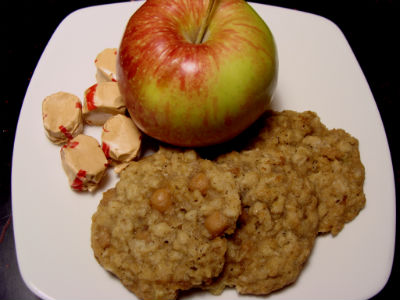
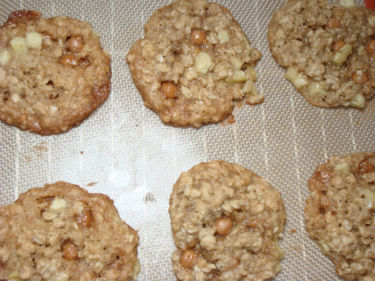
Caramel Apple Oatmeal Cookies

Caramel Apple Oatmeal Cookies – (caramel apple oatmeal cookies recipe and instructions follow) – So, here it is, Christmas time again – yay! I don’t know if you are anything like me, but if you are then when it comes to Christmas you are in the kitchen baking cookies. I love, love, love to bake cookies. So, the other day I was at the store stocking up on all of my cookie baking needs, and what did I find? I’ll tell you what I found, some caramel chips. Not like chip chips, but like little spheres of caramel. Now, I don’t know if those existed last year and everybody just managed to buy them before me, or if they are a new thing on the market this year. But, what I do know is that I am super duper crazy excited because – ? I’m going to make caramel apple oatmeal cookies ? and they are going to be the bomb. 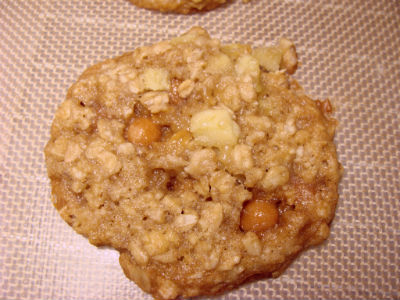 I have to say here though, that of course, I’ve had apple cookies, even apple oatmeal I think. But there is always one flaw in those cookies. Dry apples. It just always seems like the apples start to dehydrate a little while they’re baking. Does anyone else notice this? Don’t get me wrong, they’re still delicious and I wouldn’t turn one down. I don’t think I’ve ever met a cookie that I didn’t like. I just think that I have a good solution to the problem. If you’d call it a problem. Do you want to hear it? Well here it goes….. I’m going to saute the apples in butter before I add them in, maybe some sugar too. Mmmmmm, doesn’t that sound good? I mean really, butter is always a welcome addition. And, I think it will make the apples less like dehydrated apples and more like apple pie apples. Hmmm, should we alter the name to caramel apple pie oatmeal cookies? Too long maybe, I don’t know. OK, you can call them that if you like it. It can be our little secret :). Shhhh! So, anyway, today, my 2 year old, my 4 year old and I are going to put on our aprons and go into the kitchen and start playing with this recipe. It’s always so much fun to bake with them in the kitchen. I’m so excited! Plus as an added bonus, my husband just happens to love caramel. So, I know that when he gets home from work today he will have a smile on his face when I tell him what I baked and I will get extra special awesome wife points. Yay! That is always a good thing. Happy cooking everyone!
**Note – I highly recommend using a Silpat or other silicone baking mat to bake these on. They stick to the pan, and they stick to parchment/wax paper. If you do not use a Silpat, you will have a serious issue getting these cookies off the pan/paper and you will end up hating me and this recipe. So what I’m trying to say here is – if you don’t have a Silpat or silicone baking sheet, get one before you make these cookies! Or, proceed at your own risk :), I did get one batch to come off of my parchment, but in all of my test batches, the Silpat was the winner by far! Also, you have to pull these cookies out a tiny bit earlier then you pull out most cookies or the caramel melts into liquid and they’re not as pretty.
Ingredients
1 1/2 cups apples, small dice (1/4 inch dice)
I used 1 Granny Smith and 1 Jonagold 
1 Tablespoon butter
1 teaspoon sugar
dry ingredients
1 1/2 cups AP flour
3 cups oatmeal
1 teaspoon baking soda
1 teaspoon kosher salt
2 sticks butter
1 cup brown sugar
1/2 cup sugar
2 eggs 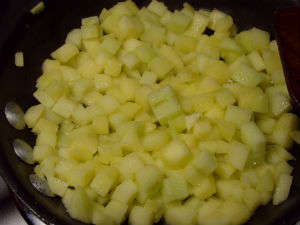
1 1/2 teaspoons vanilla
1 1/2 cups caramel bits (I used Kraft)
Special Equipment
Silpat or silicone baking mat – these cookies stick to the pan and to parchment. I really highly recommend only making these if you have a Silpat or other silicone baking mat. There is a link at the bottom to where you can purchase one (no, I’m not the seller).
If you’re new to making cookies, I’d like to invite you to read my article and watch a short video “The Cookie Method – How to Properly Mix Your Dough :D! ”
Instructions
1. Bring all of your ingredients to room temperature. At the very least, make sure your butter is soft. This helps with the mixing process.
2. Melt the one Tablespoon of butter in a saute pan. Add your diced apples. Sprinkle them with the teaspoon of sugar. Saute them for about two minutes – until you see liquid coming out of them and they are beginning to get soft. Don’t over cook them or they will lose their shape and you will end up with something closer to applesauce. Set the apples to the side to cool off.
3. In a small bowl, combine all of your dry ingredients – the flour, oatmeal, baking soda and salt.
4. In a large bowl, cream your butter with your brown sugar and white sugar. Scrape the bowl with a rubber spatula, make sure that you get the sides and the bottom. We want to make sure that there are no chunks of butter hiding that didn’t get mixed in.
5. Add the eggs into the butter mixture and mix to combine.
6. Add in the vanilla and mix. Scrape the bowl again, and again, make sure to get the bottom and the sides.
7. Add in your dry ingredients half at a time and mix in between additions. Only mix it until the dry ingredients are incorporated. Over-mixing your dough will give you tough cookies.
8. Once you have all of the dry ingredients mixed in, add in your cooled apples and the caramel bits. *see note* Stir them with a rubber spatula. It takes a few minutes and a little arm strength to get them all mixed in, but be patient and try to get the caramel and apples mixed in as evenly as possible.
9. Wrap the dough tightly in plastic wrap and put it in the refrigerator for at least 1 hour and up to six hours. If you want to store it raw longer, freeze it.
10. Pre-heat your oven to 325°F.
11. Drop the cookies by Tablespoons onto your Silpat. Make them as round as possible. This will make your cookies come out more round.
12. Bake at 325°F for 8-9 minutes. Pull the cookies out while they still look a little raw on top. They will finish cooking outside of the oven. If you over-bake them, they will be a mess of melted caramel and not pretty, so watch them close in the oven.
13. Remove the cookies from the oven. Transfer your Silpat to a cooling rack. Let the cookies cool completely before you attempt to move them or they will fall apart. The caramel is like liquid magma until it sets back up, so just wait until they are cool.
14. Finally, enjoy your caramel apple oatmeal cookies. Mmmmm, so good!
**note on step 8 – – I have also found that instead of mixing the caramel and apple bits in, you can make them the center of the cookie. So, what I did to do this is – I made a flat cookie, then I put a couple of the caramel bits in the center along with some of the apples and then I folded the cookie around the filling so that it would be in the center. After you bake them you end up with a caramel apple filled oatmeal cookie. – Yum!
White Chocolate Peppermint Cookies

White Chocolate Peppermint Cookies – (white chocolate peppermint cookies recipe and instructions follow) – If you know me at all by now, you know that I have kids. One of them being a two year old. Do any of you have a two year old in the house? If so, you are totally going to empathize with this. We put up our Christmas Tree a few days ago right, so, we started off with you know like a normal tree. Decorated from the bottom to the top. Like ya do, you know. Anyway, my very awesome two year old, Alicia, is fascinated with the tree, of course. And with the ornaments, of course. And especially with the candy canes – yes, of course. So, I hear myself say at least 20 times a day – “no, no, no, those are to look pretty, not to throw/eat” (depending on what she grabbed). Well, ten broken candy canes later…and several thrown ornaments (shatter proof, yay :D), I have re-decorated our tree. Yep, it’s naked from two year old reaching height down. It’s still pretty though – at least half way up and to the top. No, I take it back. The bottom is still pretty too. That’s only because we have one of those super dope white Christmas Trees- yes a fake tree, allergies. And, my husband always wanted a white tree growing up but his parents thought that they were ugly so he never got one – :(, sad, I know. What was my point? Oh, broken candy canes. So Tia, my four year old (being never discouraged) saw the pile of broken candy canes and her little face lit up and she said – “Oh Mommy, I have the best idea. We could make cookies out of the candy canes”. Great idea Tia. So, after a little adjustment to her original idea of candy cane marshmallow cookies – which probably would be good too. We decided to make white chocolate peppermint cookies. Oh yeah! And, they are super duper tasty. Happy Cooking everyone!
Ingredients
Dry Ingredients
2 cups AP flour (all purpose flour) 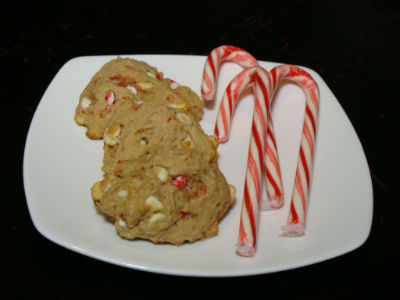
2 cups whole wheat flour *see note
1 1/2 teaspoons baking soda
1 1/2 teaspoons baking powder
1 teaspoon Kosher salt
2 sticks (16 Tablespoons) butter
1 cup brown sugar
1/2 cup Splenda *see note 2
3 eggs
1 Tablespoon Vanilla
1 cup plain yogurt (I use fat free)
1/2 cup crushed candy canes (around 6 big ones)
2 cups white chocolate chips
Instructions
1. Bring all of the ingredients up to room temperature. At the very least, make sure the butter is room temperature.
2. In a small bowl, combine all of the dry ingredients. That’s the flours, baking powder, baking soda, and salt. Stir them together.
3. In a large bowl (use you stand mixer if you have one because the dough gets very stiff ), cream the butter, brown sugar, and splenda. Scrape the bowl (sides and bottom) with a rubber spatula.
4. Add in the eggs and mix to combine. Scrape the bowl with a rubber spatula.
5. Add in the vanilla and mix to combine.
6. Add in half of the dry ingredients and mix to combine. Start on a low speed so that the dry ingredients don’t poof out at you in a big cloud. Also, only mix it until it is combined. You don’t want to over-mix your dough. It makes your cookies tough.
7. Add in the yogurt and mix to combine. Scrape the bowl. Make sure you get the bottom really well (sometimes the dry ingredients or clumps of butter like to hide down there and not mix in well).
8. Add the rest of the dry ingredients and mix to combine. The dough should be pretty stiff once you get the rest of the dry ingredients in there.
9. This is a good time to pre-heat your oven. I usually don’t do it at the beginning of the recipe only because I live in AZ and it makes the house hot. Plus, why waste all that electricity right? Oh, it needs to be 350°F.
10. Add in the white chocolate chips and the candy cane pieces. Mix the dough with a rubber spatula. Again, make sure that you are scraping the bottom of the bowl and the sides really well. Your going to get a good arm work out here because like I said, the dough should be pretty stiff. Stir it and fold it until you are sure that the chips and the candy cane pieces are mixed in nice and even.
11. Line your sheet pans (cookie sheets) with parchment paper (waxed paper). You can also use a silpat if you have one but they will cook a tiny bit faster on the silpat so watch them. Also, I highly recommend not skipping this step because the candy cane bits melt and they will stick to your pan like crazy and then you’ll be scrubbing pans which is not fun … at least to me.
12. Drop your dough onto the lined sheet pans about a Tablespoon at a time. They need to be around two inches apart. They don’t spread very much though (as long as you’re not making any changes to the recipe (like in the notes)).
13. Bake at 350°F for about 14-15 minutes until they are light golden brown.
14. Remove from the oven and allow the cookies to set on the pan for about one minute.
15. Transfer the cookies with the paper onto a cooling rack. So, basically, just carefully slide the whole paper off of the pan and onto the cooling rack.
16. Allow the cookies to cool before you take a bite. Trust me, you do not want to bite into a piece of hot molten candy cane. It will burn you for sure. It’s hot melted sugar – ouch!
17. Once they are cool enough to eat, eat ‘em, they’re yummy! Enjoy! Oh, also, I’m not exactly sure why, but these cookies taste better the next day, at least to me, kind of like spaghetti. Wait, they don’t taste like spaghetti, they just taste better the next day- like spaghetti does :) – Yeah, so enjoy!
*note 1 – You can replace the whole wheat flour with AP flour, but it will change the texture slightly and the cookies will spread more. You can help this by putting in 2 Tablespoons less of the plain yogurt.
*note 2 – You can replace the Splenda with white sugar. It shouldn’t change anything except your cookies may brown a little faster…..and the amount of calories of course. But go for it if you want to. :)
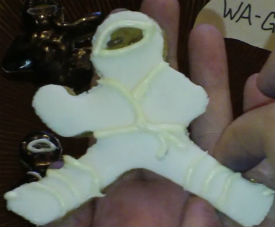
Ninjabread Men – Gingerbread with a Kick – WA-GA!

Ninjabread Men (recipe follows) – Last year I was surfing around on Amazon and I came across the coolest thing ever. Ninjabread Man Cookie Cutters. I know, super cool, right? So, upon finding said cookie cutters, I placed them in my Amazon shopping cart and much to my dismay I was rejected. Has this ever happened to you? You’re all excited about some cute purchase and snatch, it’s stolen out of your cart because you didn’t check out quick enough and the last one sold. It’s rare, I know, but it’s happened to me twice. That’s right twice. So, anyway. This year, I was super determined to get my cookie cutters. I actually thought about them several times during the year. (What’s wrong with me)? And the other day, I was on Amazon again and I happened to remember my beloved ninjabread man cookie cutters so I put in my search and guess what – OH YEAH, they were available. P.S. on that though, one of the sellers was already down to 2 sets and this is September. So I jumped on it and ordered my very own set. And, (sing this part like a bratty kid) ? they came in the mail on Wednesday, they came in the mail on Wednesday, they came in the mail on Wednesday?, Yay! I’m so happy! Now, I have my inspiration for a new recipe. So, I’ve been working on this for 2 days now and I have come up with this - Ninjabread Men – Gingerbread with a Kick – WA-GA (that’s my kick sound like in a video game or on a Karate movie). And what do I mean by gingerbread with a kick? What is the difference between gingerbread men and Ninjabread men? Ninjabread men have a kick – YEAH! At least that’s how I envision them. Oh, that’s not a good explanation. What I mean to say is that the Ninjabread men are spicy. MMMMMM, spicy and sweet together in a cookie at last. Don’t worry everyone, fear not the spicy cookie, because they are killer! LOL, killer, get it killer, because they’re ninjabread men, nnninjabread men. This next line is to be read in a high pitched and slow voice ready - I’mmm funnnyyy! So, let’s bake people! Woooooh!
Ingredients 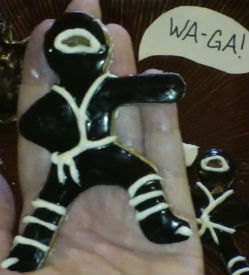
Make sure you read the instructions before you start!
5 cups AP flour
1 1/2 teaspoons salt
1/2 teaspoon baking soda
4 teaspoons ginger (dried, ground)
2 teaspoons cinnamon
3/4 teaspoon ground cloves
1/2 teaspoon nutmeg
1/2 teaspoon black pepper
1/2 teaspoon cayenne
1 teaspoon mace
In a separate bowl
16 Tablespoons (2 sticks) butter, at room temperature 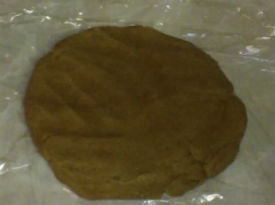
2/3 cup brown sugar (Light or dark will work, but dark will add more flavor).
2 large eggs
2/3 cup molasses
Instructions
1. In a small bowl, mix together your dry ingredients (the flour, ginger, cinnamon, cloves, salt, baking soda, black pepper, cayenne and mace)
2. In a separate and larger bowl, cream together the butter and sugar.
3. Add the eggs and mix well.
4. Add 1/3 of your dry ingredients and mix. 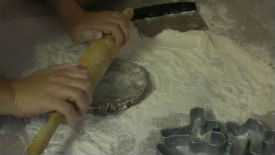
5. Add half of the molasses and mix. Scrape your bowl and paddle/beaters.
6. Add another 1/3 of your dry ingredients and mix. Scrape the bowl and paddle/beaters.
7. Add the other of half of the molasses and mix. Scrape the bowl and paddle/beaters.
8. And finally, add the remainder of the dry mix and mix it. Remove the dough from the bowl.
9. Divide your dough into four equal pieces. Shape and flatten each of your four pieces into disks that are about one inch thick. Wrap them tightly in plastic wrap and place them in an airtight container (like a gallon baggie or a plastic container).
10. Place them in the refrigerator for at least four hours and up to two days. Remember, the longer 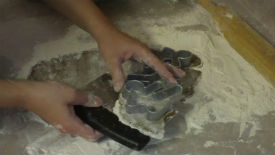
you let your dough set the more flavor it will have, so, give the spices a chance to do their job :). You can also freeze your dough at this point for up to three months. This is a great way to get a jump start on all of those Christmas Cookies that you’ll be baking!
11. When you are ready to bake your Ninjabread Men – WA-GA, pre-heat your oven to 350°F.
12. Remove one disk of dough from the refrigerator. Unwrap it and place it on a well floured surface. Also, be sure to put flour on your rolling pen, cookie cutters, and bench knife or spatula.
13. Roll your Gingerbread, make that Ninjabread Men out to about 1/4 inch thick.
14. Use a floured Ninjabread Man cookie cutter to cut your cookie dough into ninja shapes (isn’t  this fun (punch, kick – WA-GA))! You can take all the dough scraps and press them together and re-roll them.
15. Carefully, very, very carefully, move your ninjas to a prepared cookie sheet. I use a bench knife to move mine, you can also use a spatula. This helps them keep their shape. I’m using my silpat to bake mine on, but you can also use parchment paper (do not use any grease, butter or cooking spray, only the parchment or silpat).
16. Bake at 350°F for 9-11 minutes. They should look dull and dry when they’re done. DO NOT OVER-BAKE! They will dry out super easy, so be careful! They should be soft when they’re done. If they come out crispy, you baked them too long – unless you like them crispy, then, good job!
17. Slide the papers onto your cooling racks to cool your little ninjas. Again, be careful! 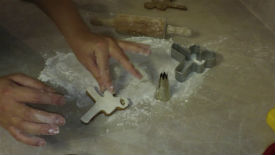
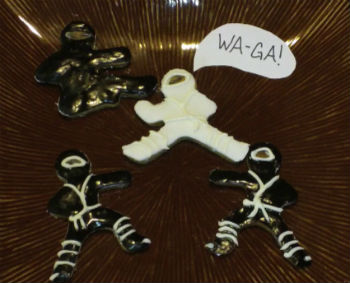
18. When they are totally cool (like me), you can decorate them. I’m doing mine with butter-cream and fondant on top just so they can have they’re little ninja suits, but you can use royal icing or just butter-cream or raisins or candy – the list goes on and on. Use your imagination and have fun – WA-GA! *If you’d like to see how I did my decorating, I invite you to watch the “how-to” video at the bottom.
19. Oh, you can store these in a airtight container between sheets of parchment paper for a couple of days. If you don’t want your decoration to smear, use the royal icing because it will harden. Also, if you do make royal icing, I recommend using pasteurized egg whites or coddling your eggs. WA-GA – that’s just plain fun, seriously, try it!
 Please enjoy this “how-to” video!
Almond Biscotti – (whole wheat)
")
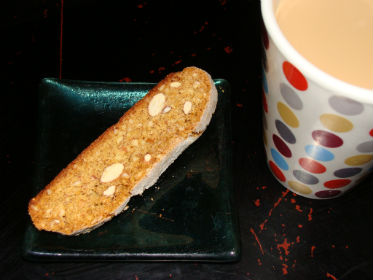
Almond Biscotti – OK, I might as well admit it, I’m a coffee addict. Hello, my name is Alicia, and I’m addicted to coffee :D! I have it every morning and some afternoons too! I don’t usually get to have it with biscotti though. I bake a lot, but the kids usually want something else – what can I say, my little ones aren’t big on the coffee yet :) LOL! So, when I do get to have it with biscotti, it makes me feel like I’m getting a little reward along with my normal morning coffee. I got to make some the other night though because it just happens that my ladies church group is doing a tea cup exchange (fun :D) and the person my cup is going to loves almonds. So, what do you put in someone’s teacup that loves almonds? Almond biscotti of course :)! Don’t worry about the little ones, they got chocolate chip cookies (I’ll post that recipe soon too)! Happy Cooking :D!
 Ingredients
dry ingredients
1 3/4 cups almonds, ground fine in the food processor
2 cups whole wheat pastry flour
1/4 cup brown sugar
1/2 cup splenda or sugar
1 teaspoon baking powder 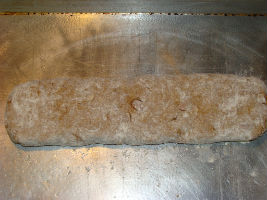
1 teaspoon baking soda
1 teaspoon coriander
1 1/2 cup almonds, whole
wet ingredients
1/2 cup honey
3 eggs
Instructions
1. Pre-heat oven to 350°F, put an oven rack in the center of the oven.
2. In a large mixing bowl, combine all the dry ingredients.
3. In a separate, small bowl, combine wet ingredients and mix them up well.
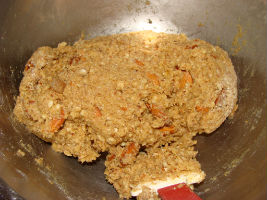
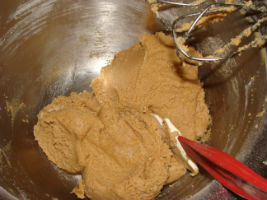
4. Pour the wet ingredients into the dry and mix by hand to combine – I use a rubber spatula. It will seem like the mix is too dry at first, but just be patient and keep mixing, put a little muscle into it :)!
5. Place the dough onto a lightly floured work surface and divide it into two pieces. 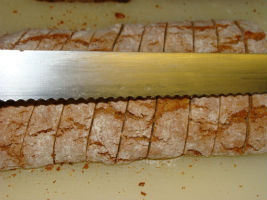
6. Roll each piece into a log that is about three inches thick, it should be almost as long as your sheet pan (cookie sheet).
7. Place the log onto the sheet pan (that you have already sprayed with cooking spray). You can put them both on one pan if they fit, just make sure they have room to spread out a little.
8. Press down gently with your hand to flatten the tops.
9. Bake at 350° for about 20-25 minutes on the center rack, when you touch it with your finger, it should feel firm.
10. You will now have a loaf. Remove it from the pan and place it on a cooling rack and let it cool, turn off the oven for now.
11. Once your loaves are cooled, heat oven to 325°F
12. Place the cooled loaves onto a cutting board one at a time and slice them on a slight diagonal about every 1/2 inch. 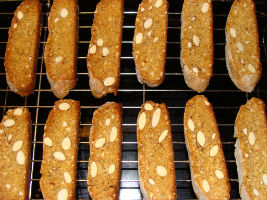
13. Place the sliced pieces cut side down on a prepared sheet pan.
14. Bake at 325°F for about 15 minutes or until toasted.
15. Cool your beautiful biscotti on a cooling rack.
16. Store in an air-tight container.
yield – about 36 pieces
Peanut Butter and Jelly Cookies – Recipe

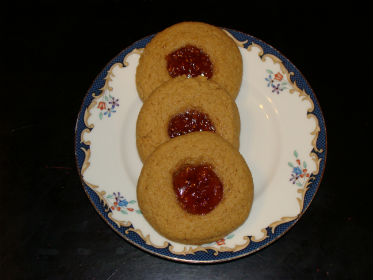
Peanut Butter and Jelly Cookies – My little girl Tia, who is three, loves to cook. I think she would rather do that then just about anything else actually. I let her use her imagination in the kitchen and try to never tell her that we can’t make something or that “that doesn’t go together”. So, on Christmas Eve, when I asked her what kind of cookies she wanted to make for Santa, it came as no surprise when she replied “peanut butter and jelly and jellybean cookies”. I mulled the idea over in my head for a minute, “peanut butter and jelly and jelly bean cookies, OK, we can do that” I thought, (still in thought) “jelly bean cookies-huh”. I of course looked at her with a great amount of excitement in my eyes and replied (in my kid friendly, high pitched voice) “peanut butter and jelly cookies with jellybeans, Santa will love them, what a great idea”! So, we commenced work on a recipe that would be fabulous and worthy of Santa’s cookie taste – after all he eats millions every year! This is the recipe we came up with. We only ended up putting jellybeans in a few of them (marshmallow and banana flavor). We got a note from Santa that he loved them :D , Tia wouldn’t let anyone else try them, so we just have to trust him ;D. The rest of us however, got to eat one of the best cookie inventions ever-peanut butter and jelly cookies (sin jellybeans-that means without). Since Christmas, I have made these a couple more times. It’s only mid-January by the way but they are sooooooo goooood! They are definitely not going to be restricted to Christmas time only! I’m so glad my New Year’s resolution was to exercise and not to diet! LOL! Happy Cooking everyone!
Finished Dough
Ingredients
2 1/4 c whole wheat pastry flour (you can use regular whole wheat if you can’t find Pastry)
1 tsp baking soda
1 tsp salt
1 stick (8Tbsp) butter
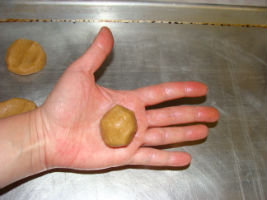
Dough Ball
1 c brown sugar (I used light)
1 c Splenda (or other sweetener)
3/4 c peanut butter
1 1/2 tsp vanilla (I like Bourbon Pure Vanilla Paste – available in the “foodie shop” on my site!)
2 eggs
8 oz jam or preserves-I used homemade raspberry preserves, but I recommend “Stonewall Kitchen” (you can order it from the “foodie shop” here on my site!)
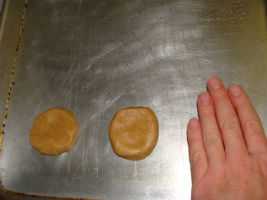
Gently press down on them.
Instructions
1. allow all of your ingredients to come up to room temperature
2. pre-heat oven to 350°
3. in a small mixing bowl, combine the flour, baking soda, and salt, stir to combine
4. in a medium mixing bowl, cream together butter, brown sugar, and Splenda,
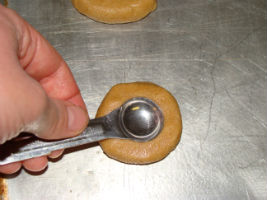
Use a measuring spoon to make an impression.
5. scrape the sides and bottom of the bowl with a rubber spatula
6. add the peanut butter and mix to combine
7. scrape the bowl with a spatula
8. add the vanilla and eggs, mix to combine – that’s right, scrape the bowl after
9. add the dry ingredients, half at a time mixing and scraping between additions
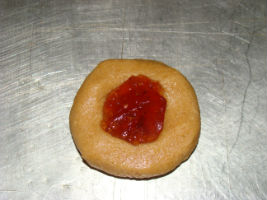
Fill the impression with jam.
10. roll the dough into balls about a Tablespoon at a time
11. place the dough balls onto a greased (I use cooking spray) sheet pan (cookie sheet)
12. flatten them-don’t mash them into oblivion, just give them a gentle little press
13. use your 1/2 tsp measure to press little circles in the middle
14. fill each impression with the jam/preserves (use your 1/2 tsp to measure)
15. bake at 350° for about ten minutes-do not allow to brown on sides (the bottom should be golden)
Enjoy your cookies!
yield-48 cookies or so - depending on how big you make them :)
Christmas Cookies – Recipe

Christmas Cookies – For this recipe, I’m going to give you two different versions. To be honest, they taste almost exactly the same. Why am I giving you two versions that taste the same? One is a healthier whole wheat and low sugar version and one is a more traditional version. I make the whole wheat for my family, but I know some people are going to want the white flour version they grew up with. Again, I would like to say that they taste almost identical (my kids ate both when I was testing these recipes and didn’t even notice). So even though they’re both my recipes, I’m going to recommend the whole wheat version. I think eating healthy is important. If you can get a whole wheat, lowered sugar cookie past the kids unnoticed why wouldn’t you? These are lots of fun to decorate too! You can use a store bought icing if you want, but the home-made one is easy to make. So, on that note, crank up the Christmas music, pour some eggnog and make some memories (and some cookies). I hope you enjoy making these as much as we did! Happy Cooking!

Ingredients
1 cup butter
1 cup sugar
2 egg yolks
1 Tablespoon orange zest
1 Tablespoon vanilla
1 teaspoon lemon extract
2 Tablespoon milk
3 cups flour
1 teaspoon baking powder
1/2 teaspoon salt
Instructions
1. Pre-heat your oven to 400°F.
2. In a small bowl, combine the flour, baking powder, and salt. Stir to combine.
3. In a large bowl, cream the butter and sugar.
4. Add the egg yolks, orange zest, vanilla, lemon extract and milk to the butter mixture and mix to combine.
5. Add the flour mixture into the butter mixture 1/2 at a time mixing in between additions to combine.
6. Wrap the dough tightly in plastic wrap (I double wrap mine and put it in a gallon baggie to keep it from tasting like whatever’s in the fridge).
7. Chill for at least 2 hours or overnight. You can also freeze the dough at this point.
8. Roll out the cookies onto a lightly floured surface to 1/4 inch thick.
9. Cut the dough into shapes and place them onto an ungreased cookie sheet.
*I use a spatula to move the cookies with a lot of detail in their shape and then remove the cutter once they’re on the pan.
10. Bake your pretty little cookies at 400°F for 6-7 minutes – do not brown them.
yield 12-15 cookies depending on shape and size
Whole Wheat Sugar Cookies
Ingredients 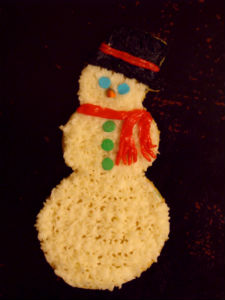
1 cup butter
1/2 cup sugar
1/2 cup splenda
1 egg
1 Tablespoon orange zest
2 teaspoons vanilla
2 teaspoons lemon extract
2 Tablespoons frozen orange juice concentrate (thawed)
3 cups whole wheat pastry flour
1 teaspoon baking powder
1/2 teaspoon salt
Instructions
1. Pre-heat your oven to 400°F.
2. In a small bowl, combine the flour, baking powder, and salt. Stir to combine.
3. In a large bowl, cream the butter, sugar and splenda.
4. Add the egg, orange zest, vanilla, lemon extract and orange juice concentrate to the butter mixture and mix to combine.
5. Add the flour mixture into the butter mixture 1/2 at a time mixing in between additions to combine.
6. Wrap the dough tightly in plastic wrap ( I double wrap mine and put it in a gallon baggie to keep it from tasting like whatever’s in the fridge). You can also freeze your dough at this point.
7. Chill for at least 2 hours or overnight.
8. Roll out the dough on a lightly floured surface to 1/4 inch thick.
9. Cut the dough into shapes and place them onto an ungreased cookie sheet.
*I use a spatula to move the cookies with a lot of detail in their shape and then remove the cutter once I have them on the pan.
10. Bake your Christmas Cookies at 400°F for 6-7 minutes – do not brown.
yield 12-15 cookies depending on shape and size  Frosting
2/3 cup butter (room temperature)
3 teaspoons vanilla
1/4 to 1/2 cup milk
6 cups powdered sugar
1. Cream the butter in a medium bowl for about 30 seconds.
2. Add the vanilla and 1/4 cup of milk and mix to combine.
3. Add the powdered sugar half at at time and mix in between additions. Use the additional milk to thin the frosting as necessary.
4. Add the color according to the package directions.
5. Decorate your cookies (I used piping bags for most of my decorating).
Choco-Latte Cookies (whole wheat) – Recipe
 – Recipe")
Choco-Latte Cookies (Choco-Latte Cookie recipe and instructions with video tutorial follow)- Warning – Choco-Latte cookies are not for kids! I suppose if you want to give them to your children, that’s up to you. My three year old had one and was running in circles around the house for about an hour though. Don’t get me wrong, she had a ball and was laughing and screaming and playing the whole time. But unless you are mentally prepared for this situation, I recommend only serving these to caffeine addicted adults, which I happen to be. Also, I did not sleep at all last night thanks to several cookie taste tests while developing this recipe so you may want to enjoy them early in the day, unless you’ve got a lot to do that night. What I’m saying is they definitely have caffeine. If you are a coffee lover like me, you will love these cookies, a-latte (they will likely call to you from the kitchen though)!
Ingredients
2 sticks butter ( I like plugra) 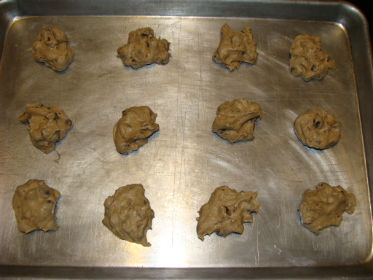
1/2 cup brown sugar
1/2 cup sugar
1 Tablesoon + 1 teaspoon instant espresso
1/4 cup milk (or plain yogurt)
2 teaspoons vanilla
3 eggs
2 1/4 cup whole wheat flour (not pastry)
1 Tablespoon cocoa
1 teaspoon cinnamon
2 teaspoon Kosher salt
1 teaspoon baking soda
2 cup chocolate chips
Instructions
1. Allow your butter, eggs, and milk to come to room temperature – or at the very least, your butter.
2. Grease your pans – I use cooking spray- you can also butter and then flour them.
3. Pre-heat your oven to 375°F.
4. In a small bowl, combine the flour, cocoa, cinnamon, Kosher salt, and baking soda – stir to combine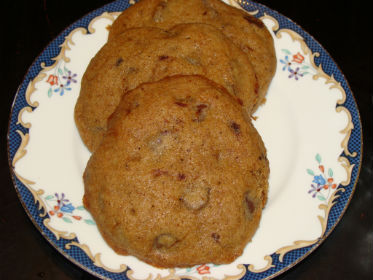 .
.
5. In a large bowl, cream your butter, sugars, and espresso powder (you can also add your espresso powder into the dry ingredients instead). Scrape the sides and bottom of the bowl with a spatula.
6. Add in the milk and vanilla and mix to combine.
7. Add in the eggs and mix to combine. Scrape the sides and bottom of the bowl with a spatula.
8. Add in the dry ingredients, 1/2 at a time (scrape the bowl between additions) and mix well.
9. Continue to mix for one minute to help develop the gluten (we want these to be chewy).
10. Stir in the chips by hand with a rubber spatula.
11. Drop the dough by spoonfuls onto the prepared cookie sheets.
12. Bake your cookies at 375°F for about 10 minutes.
I hope you love these cookies as much as we do! Enjoy!
Please enjoy this “how-to” video of the cookie method!