


I know that there are a lot of sites that you could go to with thousands and thousands of recipes. You won’t find that many here, yet ;D, but these are my personal recipes. I developed and cooked each one, and there is a lot of love behind them. Also, I won’t post anything that I haven’t made, so I know that these recipes will actually come out if you follow the instructions. If you find that you have a question about one of them, please feel free to contact me! I hope you love these recipes as much as my family and I do! I will add lots more recipes, so check back often. Happy Cooking!
For a complete list of recipes on the site so far, check the index.
Recipes
Pastelon
Creamy Chicken Rotini with Swiss Chard
Roast Chicken with Baby Bella Mushroom Stuffing
Rosemary, Thyme and Balsamic Glazed Ribs
Grilled Chicken – Also, a Little Extra About Brines
Slow Roasted Pulled Pork – Can you Say Slaw Burger – MMMM!
Pernil – Or In This Case, Roasted Pork Loin – Puerto Rican and Yummy!
The Best Lean Hamburgers Ever with Swiss Cheese and Sauted Mushroom Sauce
Roast Chicken with Baby Bella Mushroom Stuffing

Roast Chicken with Baby Bella Mushroom Stuffing (recipe follows) – Roast Chicken with Baby Bella Mushroom Stuffing is such a great recipe if you’re a mushroom fan – which I am. The stuffing is more mushroom then bread which is something that I love about it. Not that I’m anti-bready stuffing, but I just super love mushrooms. Also, I like that they stay nice and moist in this recipe because I’ve had quite a few mushroom stuffings where the poor little mushrooms become like little dehydrated mushrooms while they’re roasting. These stay super duper fat and juicy and yummy in this recipe – yay! If you happen to like your stuffing where it gets all yummy kind of crunchy on the outside and soft on the inside then you will either want to bake the stuffing in a separate casserole (like don’t stuff your chicken), or you can do the barely in the cavity and mostly flowing out of the chicken presentation (that’s the way my Mom always used to do it when I was little). When I make roast chicken and stuffing (whatever the flavor), I like to give everyone the option on their stuffings so I put half in the chicken and half into a small souffle dish (I think it’s a two cup dish). That way, everyone can have their mushroom stuffing the way they like it the most. Another thing I’d like to mention about this recipe, is that I use a really cool technique for flavoring my roast chicken with a compound butter. You put the compound butter under the skin. This is one of those things that you learn in culinary school or when working with a Chef ;). Putting the flavoring ingredient that you are using under the skin makes a huge difference in the end taste of the meat because the flavors don’t really make it through the skin. Soooo, if your putting say your dry rub or compound butter just on the outside of the skin, it really won’t do much for the flavor of the meat underneath- although the skin may be delicious. The technique is explained in step four, but it is easier to show you in video form, so if you can, I’d like to invite you to watch the “how-to” video for this recipe (coming next week). Happy cooking everyone!
 Ingredients
Compound Butter for chicken
2 teaspoons Kosher salt
1/2 teaspoon black pepper
1/2 teaspoon dried thyme
1 teaspoons brown sugar
4 Tablespoons butter
2 teaspoon sherry
1 (5-6 pound) chicken
For the Mushroom Stuffing
2 cups bread cut in cubes (french bread is best)
1 teaspoon olive oil
Kosher Salt
black pepper
1/2 stick butter (1/4 cup)
1 carrot, diced 
1 stalk celery, diced
2 large shallots, thinly sliced
2 cloves garlic, minced
baby bella mushrooms, rough chopped
1 teaspoon dried thyme
1 – 1 1/2 cups chicken broth
2 Tablespoons parsley, chopped
Kosher Salt
Black Pepper
Sherry
Instructions
1. Combine all of the ingredients for the compound butter in a small bowl except the butter and stir them together. Add the butter and mash/stir it in. If you have a food processor, this is a lot easier because you can just put everything in there and mix it for a few seconds. I used my mini-food processor for this part. 
2. Get your chicken. Remove the neck and any internal organs that may be in there. If you would like to make a sauce out of them, feel free, I won’t be doing that today so I am just discarding them.
3. Rub half of the compound butter into the chicken’s cavity focusing mostly on the area under the breast.
4. With a small rubber spatula, carefully lift the chicken’s breast skin from the meat. Using your hand, place 1/2 of the remaining rub onto each chicken breast under the skin. Check out the “how to” video to see me do this. This is the awesome technique I was talking about earlier.
5. Cover the chicken and place it in the refrigerator while you make your stuffing.
6. Pre-heat your oven to 400°F. 
7. Toss your cubed bread with the teaspoon of olive oil and salt and pepper.
8. Bake your bread cubes at 400°F until they are golden brown. This will take about 5 minutes. When they’re done, put them to the side to cool.
9. While your bread is toasting, melt the butter in a large saute pan.
10. Saute the carrot and celery in the butter (sprinkle them with a little Kosher salt (like 1/2 teaspoon) and pepper) for 3 minutes, then add the shallots and garlic. Saute for about one minute.
11. Add the mushrooms (add a tiny more salt (like 1/2 teaspoon). Saute them for another 4-5 minutes. Add the parsley. Saute for another minute or so.
12. Combine the cubed bread with your mushroom mixture in the pan. Stir it around. Add the thyme and stir.
13. Add enough chicken broth to make it moist – start with 1/4 cup and work your way up from there. I used almost a cup, but it varies each time I make this. The amount you need is going to depend on how much liquid was in your mushroom mixture and how toasty your bread was so you will have to use your own judgement on this. Add the sherry. Taste the stuffing and decide if it needs more salt or pepper. It should be OK, but now’s your chance. Also, remember you’ll be putting it in your chicken which has salt in it, so don’t over salt. 
14. Stuff the chicken with the stuffing. Take the left over stuffing and place it in a baking dish. You can serve it on the side. Also, you don’t have to stuff your chicken. You can bake your stuffing separatly.
15. Roast your chicken at 400°F until it’s done. It should have a temperature of 165°F in the thickest part of it’s thigh. This will take about 1 1/2 hours depending on the size of your chicken. Remove it from the oven when it’s done and cover it with foil to keep it warm and to allow the meat to rest. Here is a link to more information on safe internal cooking temperatures according to the FDA – FDA Site
16. You can use the pan drippings to make a sauce if you’d like.
Please enjoy this “how-to” video!
Rosemary, Thyme and Balsamic Glazed Ribs

Rosemary and Balsamic Glazed Ribs (recipe follows) – I just want to start out by saying that these ribs are the bomb, no really they are. I don’t want to sound like all “ewww, my ribs are the best” or anything, but I love this rib recipe and it’s been a long time in the making. Well, I’ve been making my ribs this way for a long time, but, I’ve made tiny adjustments to the recipe each time – until now. But now, ta-da, I have achieved rib perfection. Plus I’m humble about it :D No but seriously, this is one of my very favorite recipes and I really think you’re going to love it. It has a really beautiful combination of sweet reduced balsamic vinegar with the deep flavor of the fresh rosemary and the brightness of the thyme and oh, it is just so good. Also, this recipe is great for days when you don’t want to do a lot of cooking like if you’re having people over or something because the ribs can be made up to two days ahead. Then you just make the glaze on the day you’re serving them. This is my “word of warning” about these ribs though. Every Time I make these ribs we all end up eating so many that all we can do is sit around wishing we hadn’t eaten so many ribs. You know how that happens sometimes – ugh! So, anyway, if you’re making dessert, you may want to go with something light like Key Lime Pie, or fresh fruit. So, enough about how yummy the ribs are already, let’s make them right? Happy cooking everyone!
Ingredients for the Wet Rub
10 garlic cloves,minced
2 Tablespoons fresh rosemary, finely chopped 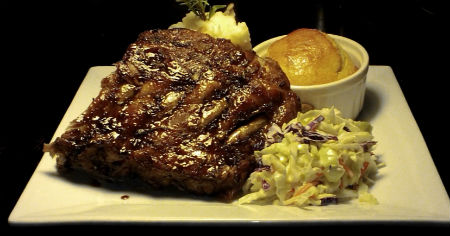
1 Tablespoon fresh thyme chopped, or 1 tsp dried thyme
1/4 teaspoon chili flakes
2 Tablespoons brown sugar
1 Tablespoon Kosher salt
1/2 teaspoon black pepper
2 Tablespoons balsamic vinegar
4 pounds pork loin back ribs
and later….
1 cup balsamic vinegar
1/2 cup brown sugar
juice from the roasting pan
Instructions 
1. Place the garlic, rosemary, thyme, chili flakes, brown sugar, Kosher Salt, pepper and balsamic vinegar into a small mixing bowl.
2. Stir them together to combine.
3. Rub the ribs with the wet rub (I just use my hands) and cover tightly. I cut the rack in half and put each half into a gallon baggie (cut it before you put the rub on or it will be slippery).
4. Put the ribs in the refrigerator and let them set for at least 12 hours and up to 24 hours.
5. Pre-heat the oven to 425°F.
6. Place the ribs into a roasting pan (concave side down).
7. Add 1-2 cups of water depending on the size of your pan – the bottom should be covered by about 1/4 of an inch.
8. Cover the pan tightly in foil. 
9. Roast your ribs until they’re done, about an hour and 45 minutes – the bone should be exposed and the meat should be pulling away from it, also you and your house should smell delicious :D
10. Take the ribs out of the pan and set them to the side on a sheet pan or plate or something.
11. If you have at least a cup of juice in the bottom of your roasting pan, strain it into a pot. If your pan is pretty dry on the bottom, pour one cup of hot water into the roasting pan and scrape off the yummy stuff that the ribs left behind (don’t do this if it’s all burned and gross). Then strain this into a pot. The point is that there is a lot of flavor in the pan that you don’t want to leave behind so scrape it out, pour it out, get the flavor!
12. Now, skim the fat off of the top of your strained liquid (that you just got out of the roasting pan) and throw it out (or eat it if you want I guess). At this point, if you want you can refrigerate your liquid and your ribs and finish them later. You can store them in the refrigerator for up to 2 days (with-out them drying out) if you wrap them up tight. This is a nice way to make them ahead of time for a get together or whatever. If you’re going to cook them now, then just continue with the next step. 
13. Add the vinegar and brown sugar to the pan juice and bring the liquid to a boil.
14. Reduce your liquid until you have about 1 cup maybe even a cup and a half depending on how much liquid you started with. It should take 10-15 minutes depending on your stove. Be sure to watch it – it will boil over easily and it will burn easily. You need to stir it with a rubber spatula while scraping the bottom every few minutes. Also, watch the consistency of the glaze (that’s what you’re making). It will get slightly thicker and begin to coat your spatula. Keep in mind that it will be thicker when it cools and you need to be able to spread it with a pastry brush. It should kind of get the consistency of like how maple syrup is if you heat it up. If you take it off of the heat and find it is too thick, you can add a little water and thin it back down as long as it’s not burned. It is better to take it off too early though because you can always put it back on the heat.
15. Use a pastry brush to glaze your ribs. You may have left over glaze which is great because you can serve it on the side of the ribs for anyone who wants extra.
16. Place ribs under the broiler on the top rack (3-4 inches from the heat) – WATCH THEM – they burn easily, they need about a minute under there and they’re done (you can also do this on the grill but….. I mean you know, the pan’s already dirty so why dirty the grill too :)
17. Hide a few in the fridge for later if you don’t live alone and then serve – Enjoy!
Please enjoy this “how to” video!
Grilled Chicken – Also, a Little Extra About Brines

Brines - A couple of weeks ago I was invited to one of the local high schools to do a cooking demonstration. Before the demo started, I was talking to one of the assistants in the class, Bob. He was super nice. Anyway, he had asked me how to keep chicken breast moist when you grill it and I had told him that I have a really great little brine recipe that I put my chicken in. I had also told him that after the demo I would write the recipe down for him. Unfortunately, I totally forgot. So, Bob, I hope you see this article because I’m going to include that recipe in it. OK, that said, brines marinades and dry rubs are a great way to add flavor to meats and also in some cases help them to retain their moisture. Someone asked me recently if you can marinade, dry rub or brine any type of meat. My opinion on that is simple – you can, but you shouldn’t. Here’s what I mean. If you have something like say chicken breast that you know is going to dry out on the grill, yes, do something about it. Brine it. Or, if you have some beautiful ribs (which do have great flavor on their own) but you want them to be a certain style like cajun. Marinade or dry rub them. So then you ask me, “well, when do you only use salt and pepper?” Which by the way is called “seasoning the meat”. The easy answer is “don’t do anything to meat that doesn’t need anything done to it”. Not to over-simplify. Here’s an example. If you have a delicious filet mignon, you don’t need to do anything but use salt and pepper. You can do more (like a black pepper rub for instance), but you don’t have to. The meat doesn’t need any help and if cooked properly, will be beautiful on it’s own. Another good example is Salmon. It really doesn’t need any help if you’re starting with a nice piece of meat. I know the trend right now is to cover the Salmon in a Teriyaki Glaze, but that’s a glaze, not a brine, marinade, or dry rub. It is also, in my opinion, overdone at this point. 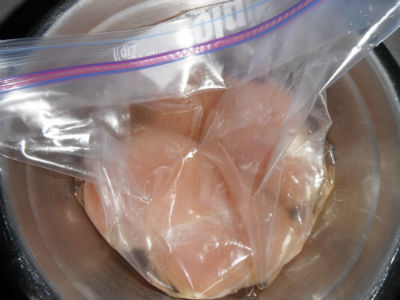 I think every chain restaurant around has one on the menu. I always see the ads – do you think they all chipped in on the same commercial clip :) – it seems like it. OK, I know, off the subject so let’s get back to it.
Brines – Technically, a brine is a cure. Brining is the method you use when you immerse a food (like beef) into a solution (the brine) of curing ingredients (usually salt and/or sugar) dissolved in water. Brines are used to preserve anything from veggies to fruit to fish and other types of meat. They are also used in the process of pickling and of making feta and a few other cheeses. They were used more in the past then they are now as preservatives, but they are still used in this way. Brisket is a good example of a cut of beef that is brined (and somewhat preserved). That’s how we get pastrami and corned beef – yummy! Like when you make pastrami, you can let your beef soak for up to 3 weeks in some cases. I don’t really ever use a brine as a preservative personally but I think I may venture to make my own pastrami one day. I’ll post if I do – of course. But the real reason that I want to talk about brines is that they are great for meat that doesn’t retain moisture well. This is because salt and sugar both retain moisture. I have already mentioned that I do this with my chicken breast. You can also brine (for flavor and moisture) other poultry, pork and beef too. I love, love, love to brine my pork chops. I use a little apple juice sometimes in my pork brine too (am I crossing in to a marinade?, maybe a little), just FYI. So, how do I make my brine for my chicken breasts? Well, here’s my very simple recipe. Also, don’t worry, I’ll do an article soon on dry rubs and marinades :D!
 Ingredients
3 Tablespoons Kosher Salt
1 Tablespoon brown sugar
1 teaspoon cumin (optional, you will be able to taste the cumin in the final dish if you use it (otherwise what would be the point huh?))
2 cups hot water
chicken breast (this recipe is for 1-2 pounds)
Instructions
1. Mix the salt, sugar and cumin if you’re using it into a small mixing bowl.
2. Add 2 cups of hot water and stir to dissolve. Allow to cool (you can also add a few ice cubes to speed things up).
3. Add the chicken breast to the cooled liquid (it doesn’t have to be cold, just not hot anymore).
4. Cover and place in the refrigerator for 2 hours. I put mine in a gallon baggie and then a bowl.
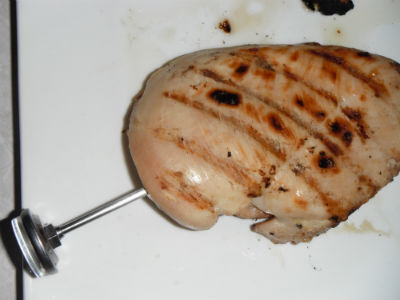
5. Grill your chicken breast until it’s done (internal temperature of 165°). Do not sprinkle it with salt first, the brine took care of that. I usually pull mine off of the grill at about 160°F and put them on a plate and cover the plate with foil to allow them to carry over cook to 165°F. This helps to avoid overcooking. Of course, I am in no way recommending that you under – cook your chicken, I’m just telling you what I do.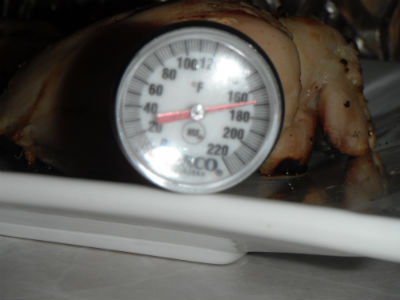 If you’re wondering how you can tell the temperature of your chicken. The answer is easy. Use a thermometer. The way to learn to do it without a thermometer is to take the temperature and then feel it with your finger. Push down and really feel the texture, and how firm it is. Do this often and eventually, you will be able to do it by feel for the most part. I do still recommend checking with a thermometer though until you are super sure of your skills. Also make sure you are taking the temperature in the thickest part of the meat and that the thermometer is in far enough. Don’t stick it in like your stabbing it in the heart, but more like you’re trying to make it into a popsicle. Does that make sense? So like stab it long ways, you know.
6. Now, let your chicken “rest” for a few minutes before you cut into it. You should actually do this with any meat. It allows the juices to redistribute.
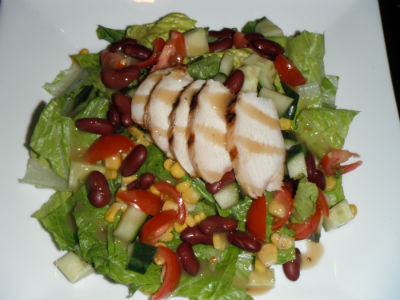
7. Serve the yummy chicken how ever you want. I had a salad with this particular chicken, but this is also how I make my chicken if I’m serving Puerto Rican rice and beans, or arroz con gandules (except I saute it for that), chicken sandwiches, etc, etc, you get the point.
Here’s a picture of my yummy salad I made. It has cucumbers, cherry tomatoes (organic), corn, red kidney beans, the yummy chicken and a little honey dijon dressing. It was super duper tasty!
Slow Cooked Pulled Pork – Can you Say Slaw Burger – MMMM!

Pulled Pork – I would like to say that first of all, there are a lot of really super simple recipes out there to make this that are basically something like – put the pork in the croc-pot, cover in ginger ale or root beer and cook. This is not that that kind of recipe. Don’t let the long ingredient list scare you though. You can have this cooking in ten minutes or so, it’s mostly just measuring out of your spice jars :D! The extra few minutes is well worth the end result. Then you can plan to spend another half hour or so the next day making the sauce and shredding the meat. You can also purchase your sauce, but I think you’ll be happy if you give this a try – it’s Bar B Q sauce not rocket science, plus, you can make some adjustments when you’re the cook and make it “your own”. Also, there are two long ingredient lists, but both lists have mostly the same ingredients so it’s not as much as you think. The other thing is, I serve this on buns topped with coleslaw and cheddar cheese. It’s so very good. Give it a try if you’ve never had it. Otherwise, you can serve your coleslaw (recipe coming soon) on the side. I also love this with fried apples (recipe coming soon), and mac & cheese. It’s all good :)! Happy Cooking!
 Ingredients (set 1, for in the croc – pot)
1 teaspoon chili powder
1/2 teaspoon mustard powder
1/2 teaspoon cumin
1/8 teaspoon smoked sea salt
1 teaspoon Kosher Salt
1/8 teaspoon allspice
1/4 teaspoon chili flakes
1 Tablespoon brown sugar
1 Tablespoon fresh ginger, shredded or minced 
1 teaspoon worcestershire sauce
2 onions, sliced 1/4 inch thick
5 garlic cloves, peeled
1/4 cup apple cidar vinegar
1/4 cup white wine
3-4 pounds pork loin, cut into 4 or 5 pieces (you can also use shoulder or butt for this)
Instructions
1. Slice your onions and set them to the side.
2. In a small bowl mix your chili powder, mustard powder, cumin, smoked sea salt, Kosher salt, allspice, and chili flakes. Add the brown sugar, fresh ginger, worcestershire, white wine and apple cidar vinegar 
3. Put a layer of onions on the bottom of your croc-pot.
4. Place your pork loin on top of the onions.
5. Pour the spice/liquid mixture on top and add water until the pork is almost covered.
6. Add the garlic cloves and the rest of the onions.
7. Put it on high heat until it reaches 140°F (for safety reasons, then lower the heat to low).
8. Allow this to cook for 8-12 hours (I did mine overnight and part of the morning, 11 hours).
9. Remove the meat from the pot and place it on a sheet pan to cool for a few minutes. Then place it in the refrigerator to cool enough so that you can handle it.
10. Strain the liquid reserving the liquid and the onions, put the onions in the refrigerator for later. *see note
11. Put the liquid in a pot, skim the fat off of the top and place it on high heat to reduce it to one cup. *see note
12. Shred your meat while your liquid is reducing.
13. Remove the liquid from the stove and put it to the side. 
14. Now, we have some more measuring to do – mix all of the following ingredients into a small bowl.
*note about step 10- The last time I made this, I chopped the onions and added them back into the croc-pot along with the sauce which follows. I liked it better this way.
*note about step 11- The last time I made this, I reduced my liquid to about 2 1/2 cups and didn’t add any water later on (step 3 below). I liked it better this way.
Ingredients for the Sauce
2 cups ketchup
1 Tablespoon chili powder
1 teaspoon onion powder
1 teaspoon dry mustard
1 teaspoon worcestershire
1/8 teaspoon smoked sea salt
1 Tablespoon honey 
1 teaspoon Kosher Salt (if the liquid you reduced is salty, put less salt here)
1 Tablespoon apple cidar vinegar
1/2 teaspoon chili flakes
1/2 teaspoon black pepper
1 Tablespoon brown sugar
*As a side note, this is how I make most of my BBQ sauces except that I sometimes also add 1 teaspoon Hungarian Paprika, and 1 Tablespoon of garlic powder. I don’t feel these are necessary in this recipe because of the fresh garlic and the smoked sea salt
Instructions 
1. Use a small mixing bowl and just go down the ingredient list (list 2 for the sauce), put everything in the bowl and stir it.
Now……..
1. I put this sauce, the reduced liquid, and the pork back into the croc-pot.
2. Stir it around really well.
3. Add 1-1 1/2 cups water (I swish my water around in the container I made the sauce in as well as the one the reduced liquid was in just to get the residual flavors but, you don’t have to do this).
4. Put the croc-pot on high, just until it’s hot and then reduce the heat to low and allow this to cook for 1-2 hours, make sure you stir it occasionally and check to make sure it’s not drying out. When you’re ready to eat, it’s ready for you. Oh, spicy mustard is really tasty on the sandwiches too! I don’t put it on them, but I put a little pile on the side so I can have some with and some without. :D – Yum!
*The next day (when it’s a little less wet), you can make “pre-made” sandwiches to freeze. These are great for me because then my son can just grab one out of the freezer when he’s “so starving mom” and microwave it for like a minute. I put them in individual sandwich freezer bags and then put all the little bags into a gallon baggie so they’re not floating around my freezer all over the place. Just don’t put the coleslaw on them before you freeze them, it does not freeze well!
Please enjoy this how-to video!

Pernil – Or In This Case, Roasted Pork Loin – Puerto Rican and Yummy!

Pernil – Pernil is a delicious, traditional Puerto Rican dish. It is a roasted pork shoulder. I don’t actually use pork shoulder so I guess technically this is not a true pernil. However, I do prepare it the way my Puerto Rican mother-in-law prepares her pernil (with a few of my own adjustments of course). I just happen to use pork loin. So, I still call it pernil. This is also the dish that we take over to my in-laws house on Christmas Eve, as is the tradition and they accept it as “the pernil”, even though it’s not the shoulder. If you’re a stickler for the rules, please by all means, use a pork shoulder. It makes no difference to me. I like the loin better, it is a more tender piece of meat and it’s easier to follow this recipe when there’s no bone in your way. This recipe is pretty simple, but a little time consuming. It will also make your hands smell like garlic for like three days so you may want to wear gloves ;D. The hands you see in this post belong to my wonderful 16 year old son. He is becoming quite a little cook and loves having fun with me in the kitchen. We did this loin together (see step five :D) while we hung out and talked. Of course this pernil was delicious because it was cooked with love…… and also because this recipe rocks. If you are a garlic fan – Yay :D, you’re going to love this! Happy Cooking!

 Ingredients
6-8 pounds pork loin (if this is too much for you, you can use a 3-4 lb loin and cut the rest of the recipe in half)
50 cloves of garlic, minced (yes, 50)
1/4 cup vinegar, I like red wine vinegar the most for this but apple cider is also good
3/4 cup olive oil
2-3 Tablespoon oregano, dried not fresh
2 teaspoon Kosher salt
1/2 teaspoon pepper, fresh ground if possible
Instructions


*see food processor instructions at the bottom if you have one
1. Place your minced garlic in a small bowl.
2. Add the vinegar and stir in.
3. Drizzle in the olive oil while stirring.
4. Add the oregano and stir, set mixture to the side.
5. Get out your pork loin and cut it in half cross ways so that you have 2 pieces that are 3-4 lbs each-put one back in the fridge (or have a friend work on that one) (you will use both, but you don’t want your pork loin getting warm while you’re working on it for safety reasons) – or, cut the rest of the recipe in half if you’re only using a 3-4 pound loin.


6. Start at one end of the loin and using a paring knife, poke a hole into the loin almost all the way through.
7. Put your finger into the hole to kind of open it up a little (you can also use the handle of a wooden spoon).
8. Fill the hole with the garlic mixture, I use a spoon and poke it in with my finger, I have also tried one of those injector things, they work OK too- just make sure you pack the garlic in pretty well.


9. Repeat the same thing all over the loin making holes about 1/2 – 3/4 inch apart in a checkerboard pattern.
10. Flip it over and do the same thing on the other side.
11. Wrap your loin tightly in plastic wrap and then put it into a plastic baggie, you can also put it into an airtight container if you’d prefer, then put it in the refrigerator- make sure you wrap it up super tight or your fridge is going to stink really bad and everything will smell and taste like garlic.
12. Get the other loin out of the fridge and start over at step six.
13. Rub any remaining marinade all over the loins.
14. Let your finished loins chill in the fridge overnight or for at least 8 hours.
15. Pre-heat your oven to 450°F.
16. Place your loins un-covered and fat cap side up into a large roasting pan (I use the same one I do my turkey in).
17. When you put it into the oven, turn your oven down to 400°F (you pre-heated to 450°F because we want a nice hot oven and when you open the door, you lose a lot of heat – don’t worry about it being over 400°F at the beginning of cooking).
18. Cook it until it is done :D – you are looking for a beautiful, dark golden brown. The USDA recommends an internal cooking temperature of 145°F (as of when this article is written) see link below, you will have to use a thermometer to check it’s temperature. It will take about 20-25 minutes per pound (mine took an hour, it was 2 pieces each weighing 3 lbs or so).
*If you have a food processor you can follow these instructions instead.
- Place whole garlic into the food processor and pulse until chopped pretty small, but not quite minced yet, add the vinegar and pulse, add the olive oil and oregano and pulse 2 or 3 times to combine, set to the side and continue with step five.


So, this is what you’ve been working for. Notice the beautiful stripe of garlic on the inside when you slice the loin – sooooooo yummy :D! Also, the picture on the left was our dinner that night. On the left are Maduros (fried sweet plantains (recipe coming soon)), on the right is Mofongo (basically tostones mashed with mojo (recipe and explanation coming soon), in back is Arroz con Gandules (Puerto Rican Rice and Pigeon Peas). In the front center is my beautiful slice of pernil (pork loin). The reason it is darker in color is because we dip it in the pan juices as we cut and serve it. This would also be good with Puerto Rican Rice and Beans and/or Tostones or about a hundred other things :D. It’s pretty versatile. The next day we use the left overs to make Cuban Sandwiches.
This is a link to the USDA’s website, it lists the recommended cooking times and internal temps. along with other facts about pork safety.
http://www.fsis.usda.gov/factsheets/Pork_From_Farm_to_Table/index.asp#19
Please enjoy this “how-to” video!
Spaghetti with Meat Sauce

Spaghetti with Meat Sauce- Anytime someone makes spaghetti, the whole neighborhood knows. That’s one of my favorite things about spaghetti, how it fills the whole house (and neighborhood) with it’s delicious scent! It seems like every time I make spaghetti, the whole family is constantly in and out of the kitchen wanting to smell the sauce and to sneak a taste. Maybe that’s why spaghetti always tastes like it has so much love in it – because it feels loved as it is cooked :D! Whenever I cook it, I have this wonderful vision in my head. It’s of a very old and beautiful Italian Grandmother. She’s in the kitchen making her sauce. She never stops to measure, her hands know the recipe by heart. She is like watching a dance as she cooks! So, now it’s time for all of us to channel our inner Italian Grandma, and make some spaghetti! Don’t forget to add the love because, food cooked with love always tastes better :D! Happy Cooking!

Minced Garlic
Ingredients
2 Tablespoons olive oil
1 medium onion, diced small (I usually use a brown onion, sometimes, I use 1/2 a red onion and 1/2 a brown onion-read step 17 for my onion notes)
12 cloves of garlic, minced (you can adjust this to your taste, I love garlic though) (see video on “how to quickly peel and mince garlic)
2 teaspoons Kosher salt (you can use a different salt, but please check out my “Table Salt” article under culinary 101)
1 teaspoon pepper
2 pounds ground beef (I use 93/7 – the 93 represents the amount of meat, the 7 represents the amount of fat, check your label)
1 teaspoon Rosemary (dried) or 1 Tbsp (fresh), chopped lightly *see note on chopping herbs
2 (28 oz) can diced tomatoes or 3 fresh, peeled (I try to use organic plum tomatoes when using canned and Heirloom when using fresh *see note on tomatoes)

Oregano (left) and Rosemary (right)
14 ounces beef stock (homemade or canned – use water if you don’t have any)
2 Tabspoons oregano (dried) or 6 Tbsp (fresh), chopped lightly
1 teaspoon thyme (dried) or 1 Tbsp (fresh), chopped lightly
1 bay leaf
1 Tablespoon of Italian Seasoning (if you happen to have any)
3 (6 oz) cans tomato paste
1-2 teaspoons sugar
2 packages of whole wheat spaghetti noodles (if you want to make homemade, go for it ;D)
Parmesan cheese for garnish
fresh basil for garnish (cut chiffonade – that means into little ribbons!)
Instructions
1. Place a large pan over medium high heat, add the olive oil, the onions, garlic, add 1/2 the Kosher salt and pepper.
2. Stir to coat them in the oil.

Ground Beef Browned
3. Add the ground beef and the other 1/2 of the Kosher salt and pepper, and mix until well combined.
4. Add the rosemary.
5. Saute until your meat is browned.
6. Add in your diced tomatoes.
7. Add in your beef stock, turn the heat to medium low. Stir every five or so minutes. Make sure you scrape the bottom of the pan when you stir, tomatoes like to stick to the bottom (I use a high heat rubber spatula).
8. Fill a large pot with very salty water (I use an eight quart pot with almost 1/4 cup of iodized salt)*see salt article.
9. Cover the pot with a lid and bring water to a boil.
10. When your water gets to a “rolling boil” add the noodles.
11. Reduce your heat to medium and stir the noodles for about 30 seconds.

Beef After the Tomatoes are Added
This helps them not stick together. You want to keep the water at a boil, but I had you reduce the heat so that it is not splashing out of the pan, you can raise your heat back up to medium high, just adjust it if it needs it.
12. Check the time, your noodles should boil for 8 minutes for regular dried spaghetti or cook according to package directions, if you’re using fresh, they will take from five to seven minutes.
13. Add your remaining herbs to your tomato sauce and the tomato paste, stir to combine.
14. Set up your sink to drain your noodles (they’ll be done soon), clean the sink if necessary and place your colander in there.
15. Check the time, your noodles are probably done.
16. Drain the noodles, add a little olive oil on top once they’re drained (like a Tablespoon). Stir them up and return them to the pot you cooked them in – DO NOT put them back on the heat, but DO cover them with the lid to stay hot.

Tomato Sauce After the Tomato Paste is Added
17. Taste your sauce, add one of the teaspoons of sugar and stir it, can you taste the difference? Now decide if you want the other spoon in there. The amount of sugar needed for the recipe is going to depend on a few things, mainly the tomatoes you used-how acidic they are and how ripe they were at the time they were canned. That’s why I want you to taste it before and after you add the sugar-so that you can learn to tell if it’s needed on your own. The type of onion you use makes a difference too. Yellow onions will add a sweetness and may make the sugar unnecessary all together, white onions are more alkaline producing (on the PH scale) and may make the sugar more necessary – yay :D isn’t food chemistry fun! Also, brown onions (which I love and use all the time) can give some people heartburn – if this is a problem for you, you may want to use a sweet onion (like a Vidalia (super sweet) or a yellow (mildly sweet) and omit the sugar all together – sorry if I made anyone’s head swim!
18. You’re all done :D YAY! Garnish as you’d like and eat your delicious homemade spaghetti! OK, one more tip, I can’t resist. When you put your noodles on the plate, it looks prettier if you first take a big pinch (a portion) of noodles out of your pot with some tongs and then kind of twist them into a tall pile on a separate plate, then put them on the serving plate. This gives your presentation more height and keeps your noodles from being all spread out and sloppy :)!

Spaghetti Wound Up Tight with Tongs
* A note on chopping herbs - Remove any thick stems, bunch the leaves into a little pile and gently pinch them, go over them with a sharp knife once, maybe twice if needed. DO NOT chop your pour little herbs to death. If you are seeing their oil on your cutting board (there will be a mysterious green color on your board) you’ve over chopped them. The oil you want in your spaghetti sauce is now stuck in the crevices of your board and gone forever :( – A little green on the board is to be expected. When you think of herbs, think of tiny layers of bubbles being in their leaves filled with oil, the more you run your knife over the leaves, the more bubbles you pop and the more oil that leaks out.

Spaghetti Plated - YUMMY!
*A note on canned tomatoes – Fresh is better, but - canned tomatoes are fine. It is true that some fruits and veggies are disgusting when canned, that is because of the different chemicals that they contain. For example, green veggies contain chlorophyll, chlorophyll does not do well when cooked for long periods of time especially when covered. Tomatoes, however, do not contain chlorophyll, they contain anthocyanins, anthocyanins are not effected by long cooking times the same as chlorophyll (though there is some loss of vitimins, that’s going to happen anyway, your’re cooking the sauce). Chlorophyll containing fruits and veggies overcook easily, their taste is greatly affected, that’s why it’s better to saute your spinach. When green veggies are overcooked they get that olive green kind of dark color, when they are cooked correctly , they are bright green. You can’t really overcook a tomato (when following a normal recipe – I’m not talking about the silly “well what ifs”). Canned tomatoes are a close second to the fresh. Use the fresh in the summertime, not the winter (at least that’s my general rule). Also, very often, the canned are better then the fresh, again, unless it is summer. That’s because they are generally canned at the peak of their season. Tomatoes are best when they are in season, like anything. The thing with tomatoes is that they don’t travel well. This is because they don’t like to be refrigerated. The ones that we get from far away are usually pricey and travel under refrigeration. I’d like to note that most of the tomatoes that do travel well and can be refrigerated have been genetically altered to do so. Google it (tomatoes crossed with fish- YUCK :P!) Yes, I know, there are varieties that are OK in the winter. Use them if you want. I am weary of the fish thing and don’t have a list of farms or companies that I bring to the store as you never know what farm/company the store bought from that day anyway! I use canned in the winter and I don’t generally make spaghetti in the summer, it’s too hot, I live in AZ. Oh, and in case you’re wondering, I grow my own Heirloom in the summer.
Please enjoy this video on “how-to quickly peel and mince garlic”!
The Best Lean Hamburgers Ever with Swiss Cheese and Sauted Mushroom Sauce – Recipe

The Best Lean Hamburgers Ever with Swiss Cheese and Sauteed Mushroom Sauce- I don’t know about you, but I can always go for a really good burger. The only thing is that often the best burger is made with fatty ground beef or a combination of fatty meats. I use the 93/7 meat when I make my burgers. If you cook this meat without doing anything to it, except seasoning of course, you usually end up with a dried out burger. That’s because the fat to meat ratio is low on the fat side. For those who don’t know what those little numbers mean, let me explain. The 93 represents the amount of meat, and the 7 represents the amount of fat. So if you have 80/20 you have 80% meat, 20% fat and so on. I would think that I’m pretty safe in saying that most people “drain their meat” when using the higher fat product anyway. So, essentially, you are literally pouring your money down the drain. In my opinion, it is more cost effective to buy the lower fat version and have more meat. It is also healthier – obviously. So, in order to make a really great burger using 93/7, we are going to have to add a few things. It’s funny because when I gave my mom this recipe she said “so you basically make something like meatloaf” and I said “yes”. I do in fact use this exact same recipe when I make meatloaf, except I bake the meat-because that’s how you make meatloaf :). These burgers can be cooked in a saute pan on the stove or grilled. I have even done them slider style in the oven. A word of caution though – if you grill them they burn pretty easily if you have big flames. Make sure you are watching them and that you don’t have actual flames under them, just hot coals or stones or whatever. Also, feel free to top them however you like :D. Oh, and just in case you are wondering what’s on the plate with the burger, those are delicious tostones de platano (Puerto Rican fried plantain chips – yum). So, without further ado, my awesome burger recipe. Happy Cooking!

sliced mushrooms in the pan
Ingredients
1 onion – diced small
2 pounds ground beef – 93/7
2 Tablespoons Worcestershire
2 Tablespoons ketchup
3 eggs
3/4 cup rolled oats
1/4 cup wheat germ
1 Tablespoon Kosher salt
1 teaspoon pepper
4 garlic cloves (minced) or 2 Tablespoon garlic powder
mushroom sauce – *Mushroom Sauce Recipe Follows
Swiss cheese (I use Tillamook)buns (I use the whole wheat sandwich thins, they’re better for you and it makes the burger more burger-y (can that be a word for today) and less bready)

mushrooms ready to drain
Instructions
1. Saute the onion until it begins to caramelize, set it aside to cool.
*If you’re making the mushroom sauce, go ahead and slice your mushrooms and get the other stuff ready to go.
2. In a large mixing bowl, combine all ingredients and mix thoroughly (I use my hands).
3. Mix in your cooled onions if you didn’t in step two (start cooking those mushrooms – step 2 below).
4. Form the patties (if you need to, separate them into nine little balls before you start so they’re all even)-I stack them and use parchment (wax) paper to separate the stacked layers.
5. If you are not cooking them immediately, cover them with plastic wrap and put them in the refrigerator – they’ll be fine for several hours or even overnight if you want to make them ahead of time. NEVER leave raw meat sitting at room temperature for long periods of time-you can get sick from it and it’s yucky!
5. Cook those burgers however you choose – saute, grill or oven. If you had your meat freshly ground from a reputable source you can probably safely cook them to whatever internal temperature you want, if not I recommend cooking them well done.

beautiful golden roux
Yield – about 9 (1/4 lb) burgers – you can cut this recipe in half if you want. The burgers will keep for four days in the refrigerator if you chill them immediately after cooking them.
Ingredients for Mushroom Sauce
1 1/2 pound Cremini mushrooms (also called Baby Bellas), sliced 1/4 inch thick
1 teaspoon Kosher salt
1/2 teaspoon pepper
1 Tablespoon olive oil
For the Roux (the roux is what thickens the sauce)
2 teaspoons butter or olive oil if you prefer
2 teaspoons flour (white AP flour, one of the few things I use it for)
Instructions

whisk your mushroom liquid into the roux
1. Wash your mushrooms-I know, you see all these chefs on TV wiping their mushrooms. I don’t care, wash your mushrooms. Put them in a bowl, fill it with water and swirl it around. Now take them out and look how gross that water is – ewww :p – aren’t you glad you washed your mushrooms? You’ve probably heard that they absorb water, maybe a little (I’ve never noticed), but guess what, it won’t hurt and if you’re cooking them, it cooks out anyway. Sorry,
but this is something I feel very strongly about! If you’re still worried, here’s a little experiment for you. Measure out 1 cup of water, now put a few mushrooms in there. Wait a few minutes and take the mushrooms out – How much water is left-a cup. Moving on.
2. Place mushrooms in a saute pan with the olive oil on high heat.
3. Sprinkle them with the salt and pepper, stir them really good to distribute the salt and pepper.
4. In a separate saute pan, melt your butter or put in your olive oil (for the roux).
5. Add the flour to the melted butter.
6. Stir it quickly scraping the bottom (I use a high heat rubber spatula for this).

delicious mushroom sauce
*You may need to add more butter or more flour depending on what your roux looks like – it should look like wet sand. Make adjustments as necessary (the reason you may need to make adjustments to these measurements is that different brands of butter contain different amounts ofliquid and fat, so, the exact measurements will depend on your butter).
7. When your roux is a beautiful golden color, remove it from the heat and set to the side.
8. By now your mushrooms should have a lot of juice around them, drain them reserving the juice (you should get around one cup).
9. Slowly pour this juice into the roux whisking as you pour, whisk it until it’s smooth and heat it until it’s thick – yay, mushroom sauce :)
10. Add the mushrooms into the sauce.
11. Top the burgers with sauce and one slice of Swiss cheese- we also put a little mayo on ours – oh, and put them on buns silly!
Enjoy!
*A note on mushrooms-You may not know this, but Button Mushrooms, Crimini Mushrooms, and Portabella Mushrooms are all the same mushroom in different states of maturity. They are the variety Agaricus bisporus. The white button and the crimini are the youngest and therefore the softest. Why are the crimini brown? Well, they are bred to be brown, but the only real difference between them and the button is color….and price. Sometimes I like to use the crimini anyway because even though I know they’re the same, they somehow seem “nicer” to me. I don’t know why – maybe because they cost more :). The Portabellas are the most mature in the family and have the “meatiest” texture and the most flavor. Look for mushrooms that have a membrane covering the gills. Those are the freshest. If you can’t find any that are still “closed” (that means the membrane is there), then make sure the cap is still turned down. If the cap is turning up, that’s a sign of an old mushroom. There, now you’ve learned something today :).

Fried Rice – My Favorite Way!

Fried Rice (fried rice recipe and instructions follow) – Fried rice is something that we eat in my family all the time. I have been cooking it since I was probably around 12 or 13 years old. Fried rice is another dish that I learned how to make from my step- mother, Van. She is an amazing cook and is also the person responsible for my love of and ability to cook Asian dishes. However, the fact that my Father’s side of the family lived in the mid-west when I was young limited the number of available authentic ingredients. This of course also put a limit on my learning about these ingredients. Van would tell me about some of the things her mother used or some of the ingredients she wished she could find, but they were simply not available. Fortunately for me, I live in a big city now and can get just about anything I want without even driving very far and there’s always the Internet. Not that fried rice has any of these exotic, hard to find ingredients, but it was during a trip to my local Asian market that this recipe was perfected and made ready to share with you. About a month ago, my husband and I were at Lee Lee’s Asian Market (with the kids) and I got into a very long and wonderful conversation with this little old Chinese woman. I’m not sure exactly why, but I always end up talking to people I don’t know when I go grocery shopping. She totally reminded me of a Chinese version of my own Grandmother with an obvious love of cooking and a passion for the right ingredients. She walked with me around the store showing me all of her favorite things to use and pointing out the mistakes in my cart. It was pretty awesome, at least for a food nerd like me! When we came to the sausages, she pointed out a sweet Chinese sausage that she puts in her fried rice. All of a sudden I had a flash back of me cooking fried rice with my step-mother and her saying (in a very heavy Thai accent) ”It never tastes right because you can’t get the sweet sausage anywhere around here”. So here it is, my version of fried rice, including the sweet sausage that has been missing all these years!
Ingredients
1/2 cup oyster sauce
1 1/2 pounds chicken, marinated
3 cups uncooked brown rice
6 cups water
1 Tablespoon olive oil
2 1/2 cups onions, small dice (1/4″ pieces or so, it doesn’t have to be perfect)
1 Tablespoon ginger, minced
1 Tablespoon garlic, minced
1 teaspoon Kosher salt
1/2 teaspoon black pepper
2 sweet Chinese sausage links, cut bite size
10 ounces frozen peas
3 Tablespoons soy sauce
1 Tablespoon sugar
Instructions
1. Slice your chicken into 1/4 inch slices. Place your chicken in a gallon size baggie or a large bowl with the oyster sauce and allow it to marinate for 2-3 hours.
2. Cook your rice in a rice cooker. If you do not have a rice cooker, prepare it on the stove according to the package directions.
3. Spread the cooked rice onto a sheet pan (cookie sheet) and allow it to cool for 30-40 minutes stirring it once or twice.
4. Allow the rice to set an additional 30 minutes to dry out a little.
*If you skip step 3 and 4 you may end up with goopy sticky clumpy rice at the end – not so yummy, I have also heard to use “day old rice” but have never done this myself.
5. Saute the onion, ginger, and garlic together in the olive oil with the salt and pepper until the onions are translucent (this is called sweating the onions in a professional kitchen).
6. Add the chicken and sausage into the mixture and cook it until the chicken is done.
7. Add the peas and cook them until they have a bright color. This takes about 2 minutes if you added them frozen.
8. Pour the soy sauce on top of the rice – try to pour it evenly across the whole top, then sprinkle it with the sugar and stir it.
9. Lower your heat to medium, add the rice, fold it in two or three times.
10. Cook the rice until it is heated through (about 2-3 minutes), folding it every minute or so. Don’t forget to check out the how-to video at the bottom of the page!

*A note about frozen veggies – I use frozen veggies in a couple of my recipes. You may be surprised to hear this, but if you are using a reputable brand, they usually have a high nutrition content. Sometimes they even have higher vitamin levels then fresh depending on how long the fresh vegetables have been off of their plant. Thanks to IQF (individual quick freezing) that is now done almost all the time, the veggies retain more of the vitamins and minerals you want. They are also generally frozen on the day that they’re harvested, in some cases it can be within hours of harvest. This is huge as far as nutrition. I would advise checking the source of your frozen veggies if this is a concern for you.
Please enjoy this how-to video!
Grandma’s Lasagna – Recipe

Grandma’s Lasagna Recipe – The lasagna story (recipe follows) - When I was a little girl, one of my very favorite things to do was to go to my Grandma’s house. She spoiled us so much-just like a Grandma should and then some! I remember when I would go with my brother and sister, my Grandma would say “I’m making pie, what kind does everyone want?”. And I’m not talking about something out of the freezer, I’m talking about delicious, made from scratch, pie. We would each put in our individual order. My brother, apple, me, cherry, and my sister “fluffy cake”(not pie at all). That’s spoiled! We of course had all of the family gatherings there too. Birthdays, Mother’s Day, Thanksgiving, Christmas etc… Well, whenever we would go to Grandma’s for a big family dinner (that wasn’t Thanksgiving or Christmas) we would always have her amazing lasagna. I remember when we’d get to her house she would always be in the middle of cooking it. Tomato sauce simmering, noodles boiling, the house would smell like heaven. I would take my position sitting on the kitchen counter to hang out with my Grandma and she would let me stir the pots and watch her cook. When it was time, I even got to help her layer the lasagna including sprinkling the cheese. This was is one of the few times as a child that I was encouraged to put my hands in food and get them dirty! I love cooking with my Grandma and I really hope that you feel the love that’s in this dish as you’re cooking it. It brings back so many memories for me that I’m writing this and fighting back tears at the same time. This dish is truly a part of me. I do have to tell you one thing about Grandma’s recipes though, any of Grandma’s recipes, if you are not trained by Grandma, they won’t taste exactly the same as Grandma’s. That’s because she says things while she’s cooking like “I know the recipe says this, but this is how I do it”. In these cases, I have done my best to adjust the recipe to “how she does it”. However, I’m sorry to say that some things you can only learn in Grandma’s kitchen!
This recipe has been passed down through 5 generations of my family. It is a twist on classic lasagna because my family can’t help adding their own flare! You can call this Italian/American Fusion, but we’ll just keep calling it Grandma’s Lasagna! Enjoy!
Ingredients
2 Tablespoons olive oil
2 pounds ground beef (I use 93/7, Grandma does not)
3/4 cup onion minced
1 (22 ounce) can crushed tomatoes
2 (12 ounce) cans tomato paste
1 cup water
2 teaspoon salt
1 1/2 teaspoon sugar
1 Tablespoon garlic powder
1 teaspoon pepper
1 Tablespoon plus 1 teaspoon oregano
9 lasagna noodles (I use and recommend whole wheat)
It is at this point that I have realized that there are no measurements for any of the cheeses, so these are my best guesses.
1 1/2 pounds mozzarella (shredded)
3/4 pound cheddar (shredded)
6 ounce cottage cheese
1 cup Parmesan cheese
Instructions
1. Saute the beef and the onion in the olive oil with 1 teaspoon of the salt until the meat is brown.
2. If you did not use a lean meat, drain the grease, if you used the 93/7 this is not necessary.
3. Add the tomatoes, water, other teaspoon of salt, sugar, garlic powder, pepper and oregano. Allow to simmer.
4. Start your noodle water – use a large pot (mine is 8 quarts) and a lot of salt (I use 7 quarts of water to 1/4 cup iodized salt (read my salt article to learn how to properly use salt)).
5. When your water is at a rolling boil, add the noodles. Reduce the heat slightly and stir the noodles for the first 30 seconds (this will help them not stick together).
6. Boil the noodles for 8 minutes. Drain them in a colander and dunk in an ice bath or run cold water over them until cool. Drain well and toss with 1 teaspoon of olive oil.
7. In a large baking pan (mine is 11 x13, but I do a 12 noodle version-this recipe is a 9 x 11 pan, see note) begin layering your lasagna – a thin layer of sauce goes down first – there is a how to video at the end of this recipe that will show you how I layer mine.
8. Here’s the order from the bottom – sauce, then noodles,sauce, *cottage cheese, mozzarella, cheddar. Now start over at the noodles, then sauce, cottage cheese, mozzarella, cheddar and repeat starting with the noodles until you have three layers, finish with parmesan on the top (I don’t use freshly grated here, it wouldn’t taste like Grandma’s).
*For the cottage cheese drop small spoons (about 1/4 teaspoon) here and there but do not cover the sauce- you just want to get a bite of it sometimes.
*For the cheese, just try to use equal amounts in each layer, you will have more mozzarella in the layers then cheddar.
9. Bake at 350° F for about an hour, up to an hour and a half – just watch for the top to turn those beautiful shades of gold and brown.
*Just as a side note, I make a larger version of this. I use 12 noodles and double the sauce and add some extra cheese. I always end up with a little extra sauce, but the kids like to eat it while the lasagna cooks with buttered bread. Also, Grandma puts sauce as her top layer, I like cheese on top-it’s up to you, both ways are good!
Check out this video on how to layer Grandma’s Lasagna!
You can find some of my other “how to” videos in my other recipes and on YouTube!