


Goat Cheese Tarts with Fresh Fig Compote – (recipe and video tutorial follow) – So, I’m nineteen weeks pregnant now and the cravings are going strong – lucky for you :). That means I’m in the kitchen making stuff that I don’t make on a regular basis, but more for special occasions. After all, twenty four goat cheese tarts is hardly good to put out at the dinner table for the kids. Although, now that I think about it, they may like the idea, they did destroy them pretty quickly. Anyway, this is a great dish to make as an appetizer for parties or to put out on the buffet. It can also be served as dessert and you can change the topping to anything that you want – ah, so versatile. They can be made ahead of time and they are delicious at room temperature. They are a little time consuming to make (this recipe will probably take you 45 minutes to an hour if you don’t recruit help), but very well worth it.
Ingredients for tart shell
1 1/2 cups A.P. Flour 
3 Tablespoons sugar
1/2 teaspoon Kosher Salt
10 Tablespoons butter (cold)
3 Tablespoons ice water
Ingredients for Fig Compote
6 figs
1/2 cup dry red wine
4 Tablespoons brown sugar
2 Tablespoons Balsamic Vinegar
Ingredients for Tart Filling
4 ounces cream cheese (room temperature)
4 ounces goat cheese (room temperature) 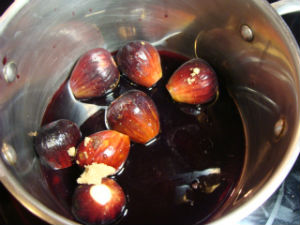
2 Tablespoons honey
1/8 teaspoon salt
2 eggs
Instructions for tart shells
1. Place your flour, sugar and salt into the bowl of a food processer. If you don’t have a food processer, you can do this by hand. Pulse/stir the ingredients to mix them evenly.
2. Add the butter and pulse a few times. If you are doing this by hand, use a fork or pastry cutter to incorporate the butter. You are looking for a texture that is similar to cornmeal with a small chunks of butter. When you have the correct texture…..
3. Add the water. I start by adding about three tablespoons and pulsing/stirring to combine. If the dough doesn’t come together into a ball, add the last tablespoon of water and stir/pulse. You should not need more then 1/4 cup (four tablespoons). 
4. Wrap the dough in plastic wrap and refrigerate for one hour. If you absolutely do not have time to do this, you can skip this step, but the shells will come out better and the dough will be easier to work with if you refrigerate it. Also, I like to double wrap mine so it doesn’t pick up any flavors from the fridge.
5. Remove the dough from the refrigerator, and unwrap it. Divide your dough ball into four equal pieces. Working with one piece at a time, roll the first piece into a “dough snake” (see video).
6. Divide your dough snake into 6 equal pieces by first cutting it in half and then cutting each half into thirds.
7. Working with one piece at a time roll the first piece into a ball. Then, mash that ball into a circle about 1/4 inch thick. This will be your mini-tart crust. Transfer the crust to the mini-muffin pan and shape it into one of the holes. Make sure that the dough is touching the bottom and the sides. Repeat steps five through seven with the remaining dough.
8. Once you have your mini-muffin pan completely full, dock all of the crusts. This means that you poke small holes in the crusts with a fork. Doing so helps keep the crust from getting bubbles in the oven.
9. Bake the crusts for ten minutes at 350°F. Remove from the oven and allow to cool. While your crusts are baking, you can start your fig compote – just set a timer so that you don’t forget about them :)
 Instructions for Fig Compote
1. Wash your figs.
2. Trim the tip of the stem end off of the figs.
3. Place figs in a sauce pan and add the wine, brown sugar, and the balsamic vinegar.
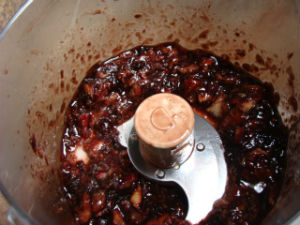
4. Place on high heat and bring to a boil. As soon as it starts to boil, reduce the heat to a light simmer. Allow the figs to simmer for about twenty minutes. Make sure you stir it every few minutes and watch the liquid. It should thicken into a syrup, when it does, it is done. You do not want all of your liquid to evaporate, so make sure to watch the figs and check on them every few minutes. Also, I use a high heat rubber spatula when I make this, that way I can scrape the bottom and sides well when I stir. Also, if your haven’t checked your tart shells, check them, they’re probably done :) While the fig compote is cooking, you can make your filling.
Instructions for The Filling 
1. Allow your ingredients to come up to room temperature. Then, cream the goat cheese and the cream cheese together. You do not have to get rid of every chunk at this point because you will be mixing after each additional ingredient.
2. Once you’ve gotten most of the chunks out, scrape the bottom and the sides of the bowl with a rubber spatula and then add the honey and salt. Mix until well combined. Scraping your bowl ensures that you will have a nice even texture in the tartelettes when they’re all done.
3. After the honey is mixed in well, scrape the bottom and sides of your bowl and then, add the eggs. Mix the eggs until combined. Scrape the bowl one more time making sure to get the sides and bottom. Then give your batter one final mix. You should mix it until it has a smooth even texture – you may still see a few cottage cheese size chunks, and that is OK.
4. Transfer your filling into a measuring cup or whatever you may have that is easy to pour out of.
 To Assemble Your Tarts
1. Pour the filling into the cooled tart shells. I like to pour some into each one before filling them all completely to ensure that I have enough batter and that they’re evenly filled.
2. Bake them at 350°F for about ten minutes until the middle is just set. This means that the middle should still jiggle a little when you shake the pan. If you over cook them, they will crack and they will have a drier feel to them.
3. Allow your tarts to cool and serve. You can either serve the compote on the side, or you can spoon a little on the tops. It is also pretty to put a little on the plate around the tarts :).
Enjoy!
Please enjoy this video tutorial!
Hi :), my name's Alicia!
Looking for something?
