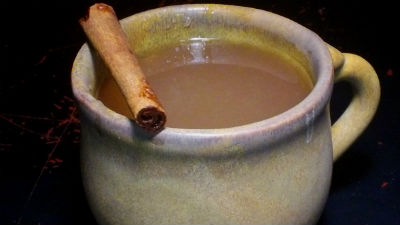
Hot Homemade Apple Cider (recipe and instructions along with a video tutorial follow) – Does anything scream fall more then a cup of delicious warm homemade apple cider? You know besides the smell of fires, the leaves changing, the pumpkin everything and the cool crisp air :) OK, so maybe the homemade apple cider just joins in the screaming of fall. But either way, I love it and I love making it for my family. If you know me at all, then you already know this, but I love the smells of fall. So, of course, one of my other very favorite things about this recipe is the way that it makes my whole house (along with my neighborhood I think) smell like the fall. Plus, when I make stuff like this, it makes me feel extra motherly – kind of like I get mom bonus points, because I feel like I’m making memories with my kids. I always hope that one day they’ll grow up and tell their future husbands or wife that their mom used to make homemade apple cider in the fall and it would make the whole house smell amazing. Or, better yet, they’ll load up all 20 of my future Grand kids (yes, I’m hoping for tons of Grand kids one day) and bring them over because Grandma (that’ll be me one day God willing) is making homemade apple cider. I mean seriously, how cool would that be? Also, this is one of the traditions in my family that my husband and I started with our kids. Neither of us grew up with the homemade apple cider in the house – not that we were deprived or anything, we just had busy parents. I have the very great privilege of being at home with my babies and I feel super crazy blessed and want to make the most of it. So I think it’s nice to have these kinds of “old fashioned” traditions around, so we do. Hooray for the Holidays – woo, excuse me, I got a little excited :D One last thing, this recipe is like crazy easy, and hot apple cider is good for you (see note at the end of the recipe) so give it a try.
Ingredients
water, preferably filtered
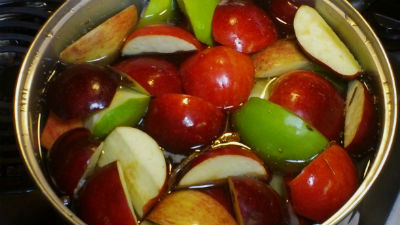
12 apples, quartered and cored
any kind of apples are fine, I’m using the following
2 Red Delicious 
2 Granny Smith
3 Cameo
5 Johnathan
1/2 cup honey
3 cinnamon sticks
3 cardamom pods
5 whole allspice
3 whole cloves
1/4 – 1/2 teaspoon nutmeg, preferably fresh
zest of 1 orange
Instructions
1. Wash your apples. Cut each of your apples into quarters and remove the cores.
2. Place the apples into a large pot. I use my 8 quart pot.
3. Add the honey and spices as well as the orange zest. If you want to make sure that your apple cider has no bits of spices in the final cider, you may want to consider using a spice sachet for this. What you need to do to make a spice sachet is wrap the spices in cheesecloth kind of like you’re making a little bag out of the cheesecloth. Once you have them wrapped, tie the top of the cheesecloth with butcher string to keep it from opening. This way, when it is time to strain your apple cider, you can leave the pulp and get all of the spices out easily by just removing the whole sachet. If you will be using a fine mesh strainer (to get a no pulp apple cider) then the sachet would be pointless. I don’t do one, I just strain mine. I just wanted to give you the option. 
4. Add the water. You will want the water to be about four inches above where the apples come to in your pot. Apples float so see where they come up to on your pot and then add the water to make it four inches over the “apple line”.
5. Bring the mixture to a boil. Allow it to continue to boil for one hour. Do not boil this on high or it will likely start boiling over. It doesn’t have to be a rolling boil, just a light boil. Every 25 minutes or so, check on your apple cider and kind of press on the apples with a large slotted spoon or spatula. As they soften, they will turn into a pulp. Also, this is going to make your house smell so amazing.
6. After it has boiled for about an hour, reduce the heat and cover the pot. I put my lid at a bit of an angle so the steam can still escape a little.
7. Allow it to simmer, covered, for another two hours. I still check on my apple cider about every half hour and press on the apples to break them up into pulp.
8. Drain your apple cider. You have a couple of choices here. If you want your apple cider to be pretty much pulp free, use a fine mesh strainer to strain it. You can also use a colander lined with cheesecloth if you don’t have a fine mesh strainer. If you want it to have pulp (which is the way I prefer my apple cider), use a colander to strain it. Just make sure to watch for bits of the spices, you want to make sure to get them out so no one ends up with a big chunk of allspice or something in their mouth. Also, if you want to be sure that no spices bits will be left behind. You can choose to make a spice sachet for your spices in step 3.
9. Once you have strained the apple cider, it is ready to serve. You can store any left over in the refrigerator for up to four days – if it lasts that long. Make sure to cool it properly before placing it in the refrigerator. And just as a note, it is also yummy when it is chilled.
Apple Cider isn’t just yummy, apple cider is good for you too!
Apple cider is high in vitamins A, C and E. It is also high in iron, and potassium. Apple cider contains flavonoids. These are an antioxidant that inhibit the growth of certain types of cancer cells. If you leave the pulp in your apple cider, then it will also contain quite a bit of fiber. Apple cider has also been shown to reduce the risk of heart disease. Not to mention that cinnamon has it’s own anti-bacterial properties. There is a ton of information out there about the nutrition in apple cider. All you have to do is Google something like “vitamins in apple cider” and you’ll get like a million sites with more info.
Please enjoy this how-to video!


